This user manual provides an information on how an athlete can register himself/herself on National Sports Repository System (NSRS). It further enables Sports Training Center to enroll the registered athletes under them, so as to enable them to avail the benefits of Government.
with this user manual, the Athletes will be able to perform the following functions:
A step-by-step guide to register as Athlete is provided below:
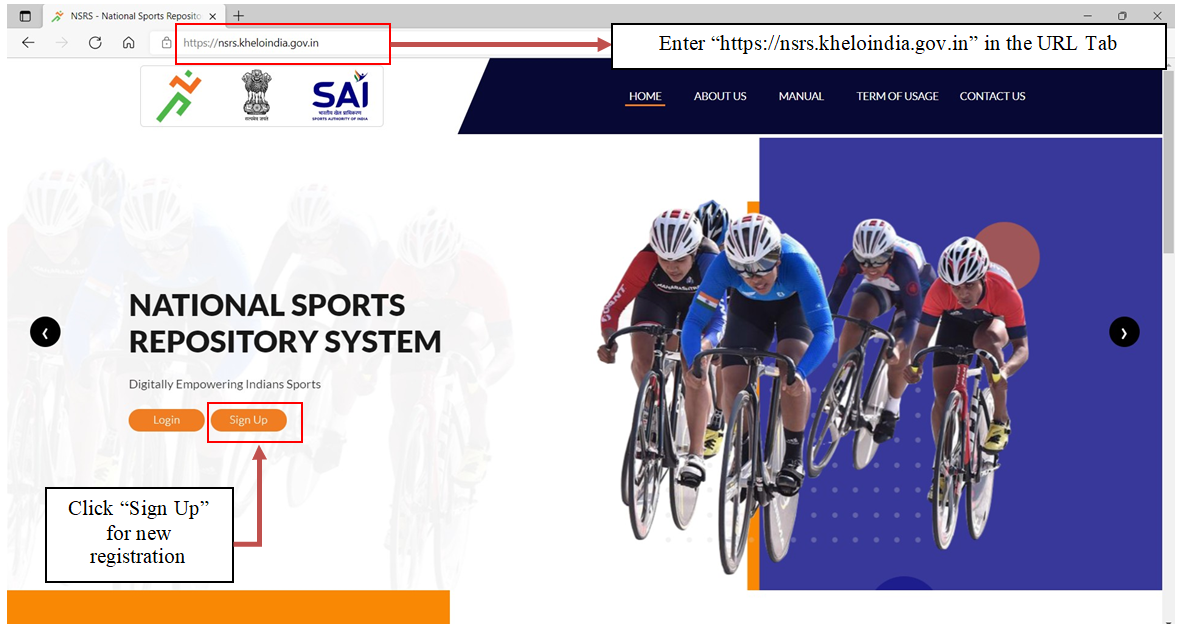
Step 1: Open the web page: https://nsrs.kheloindia.gov.in/Login
Step 2: If the athlete is not registered, then need to click on tab Register Here , and the user will be directed to new page.
Step 3:The new page will appear as follows.
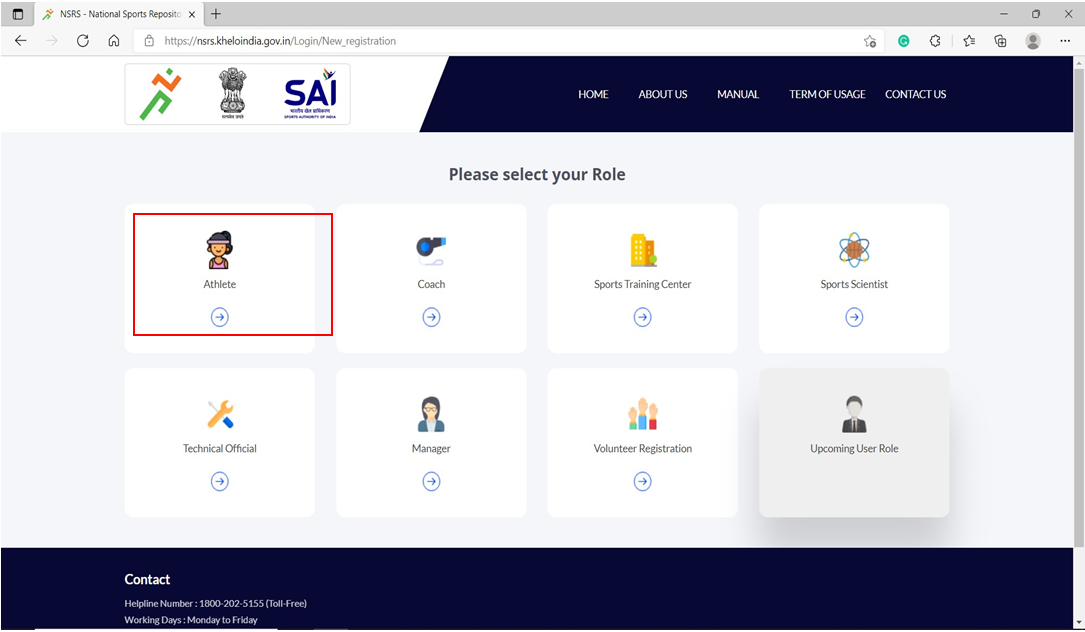
Select the Athlete TAB and Proceed further for registration page
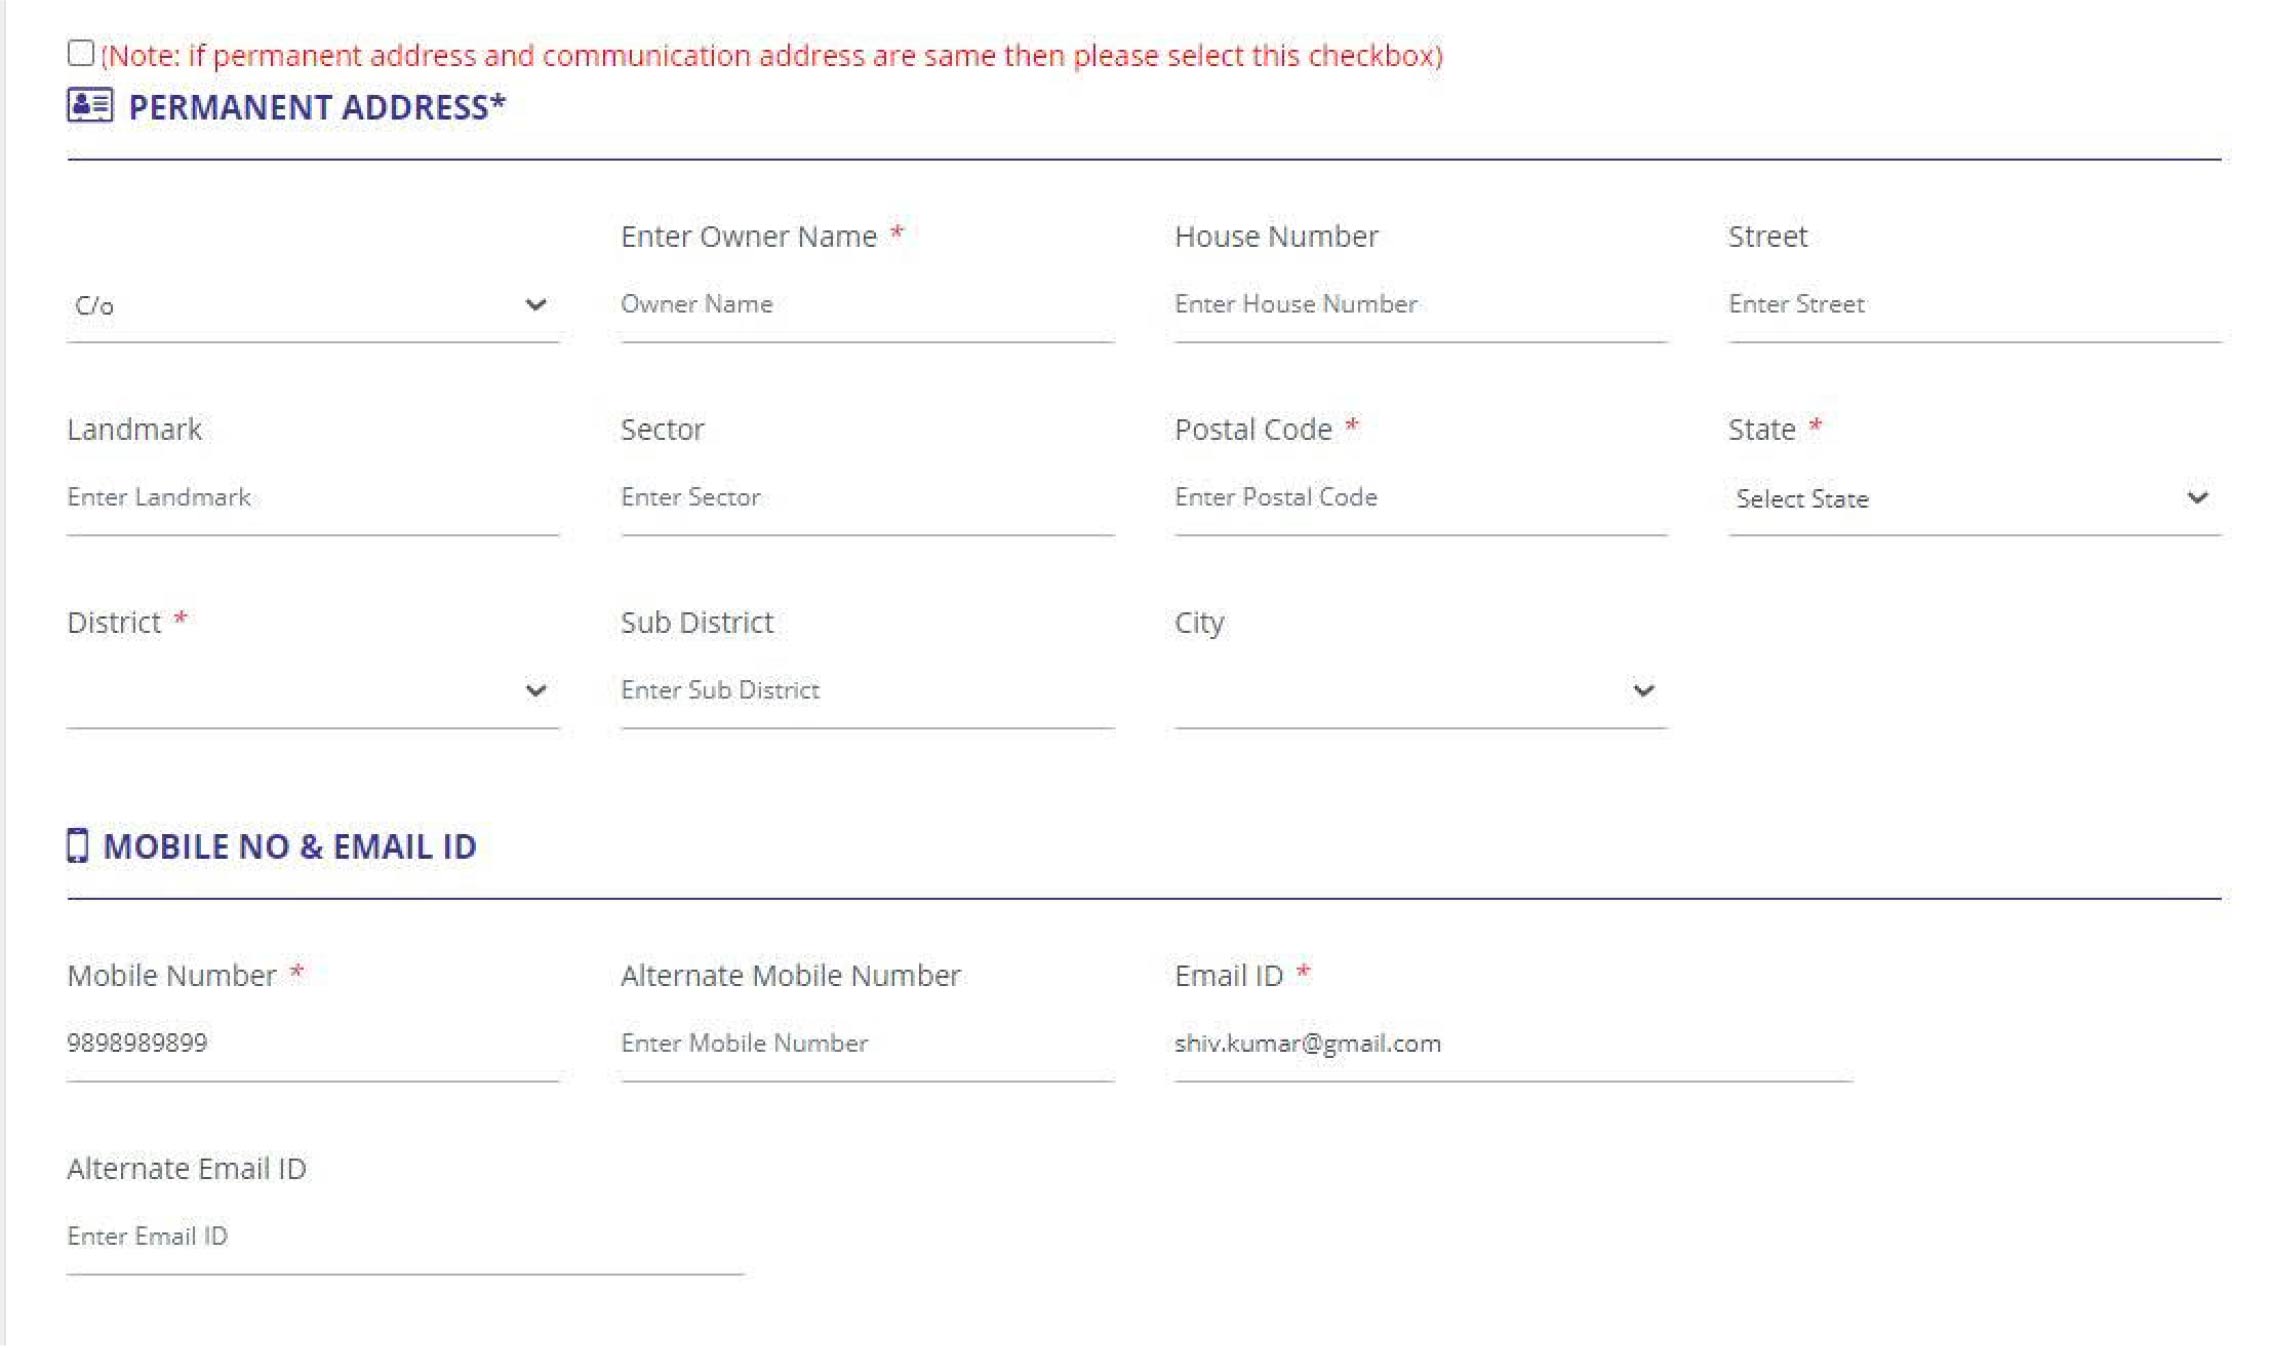
Step 4: The registration first page will appear as :
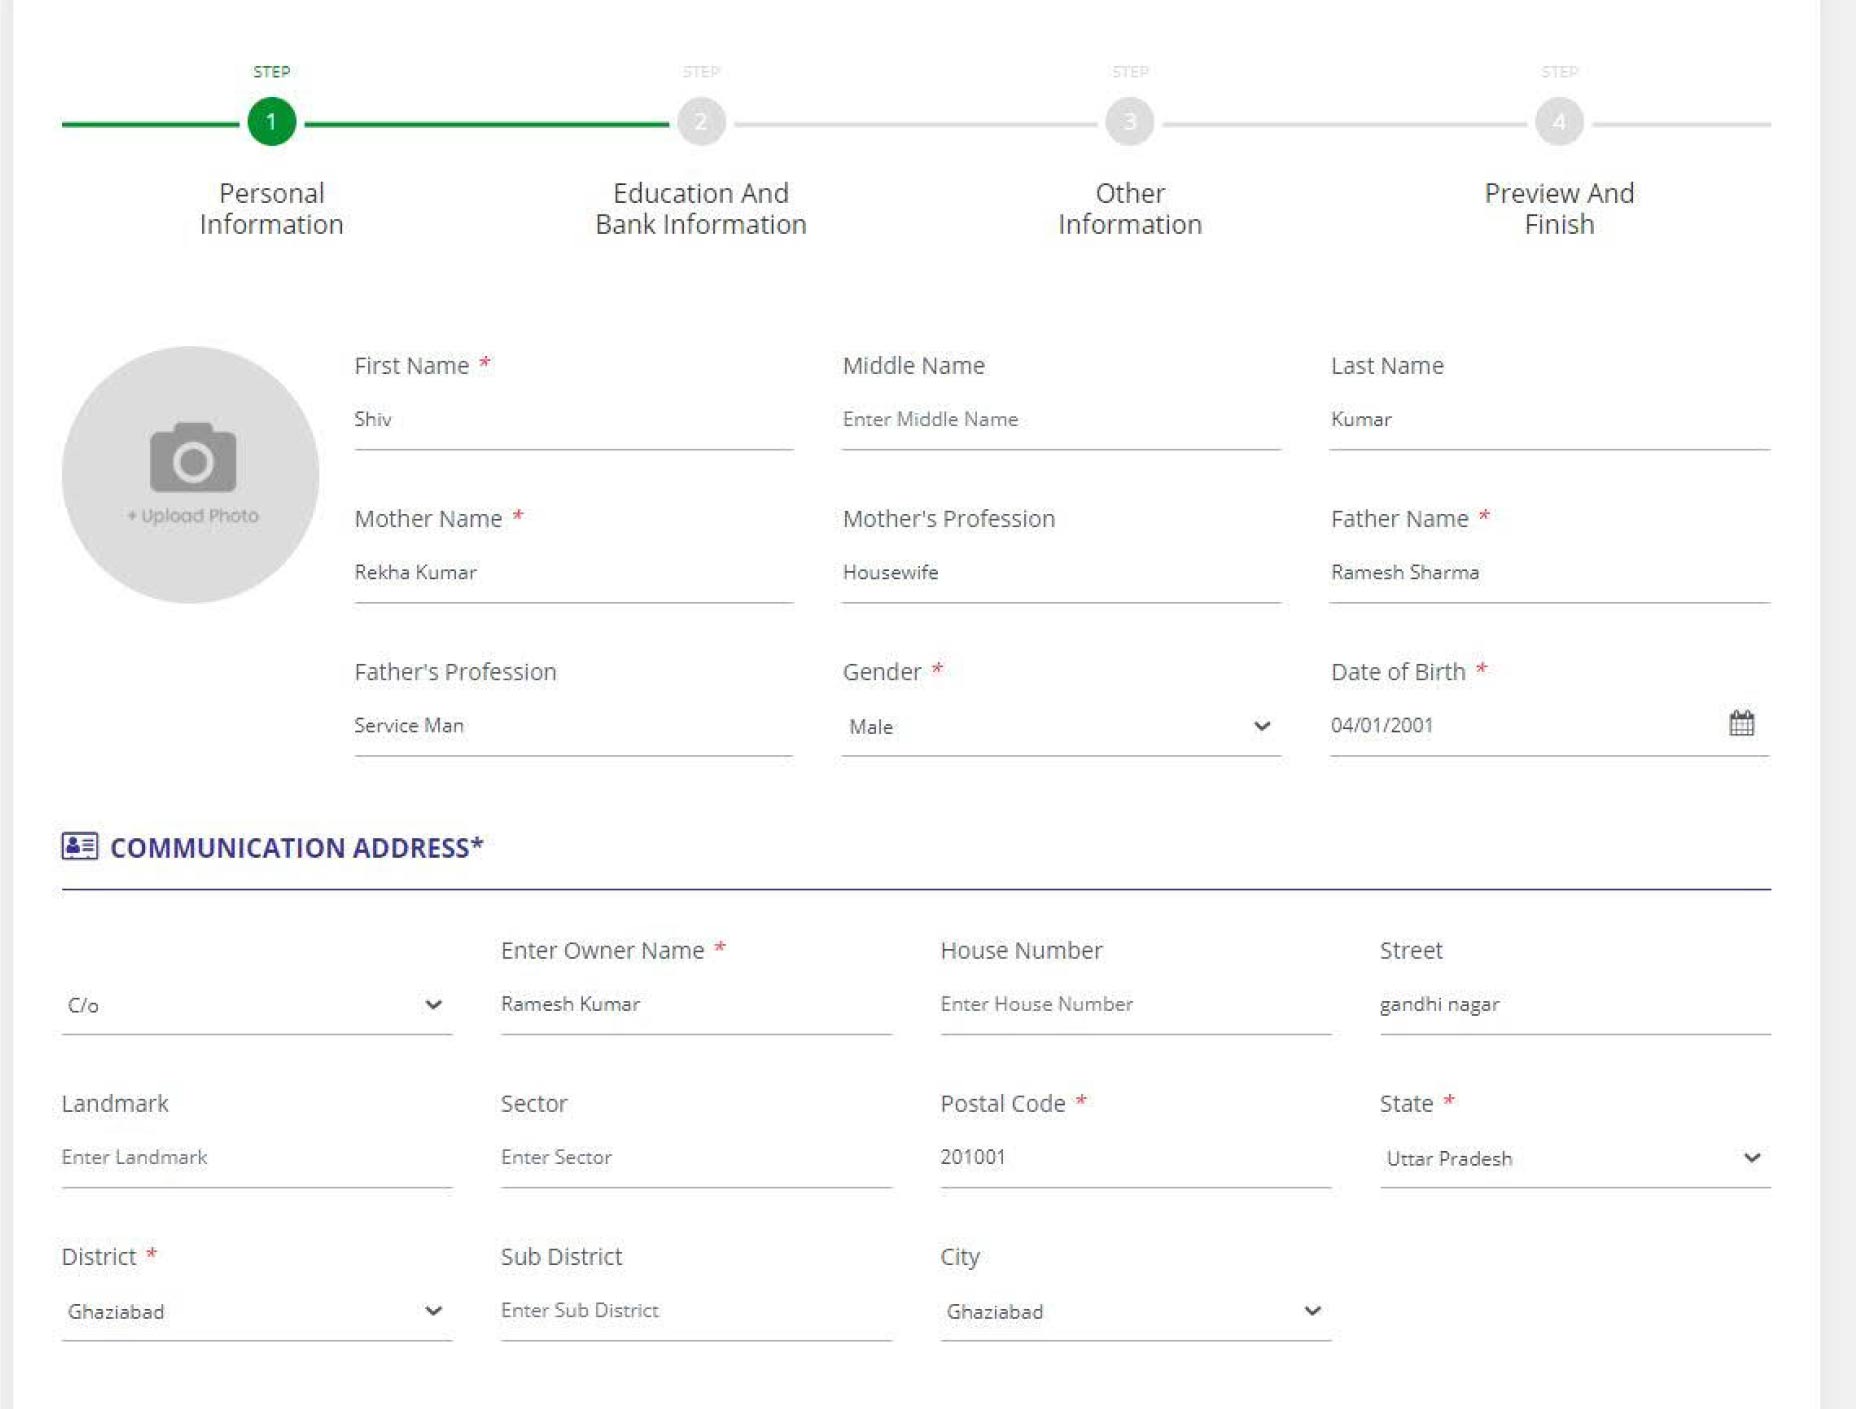
Following details will be captured :

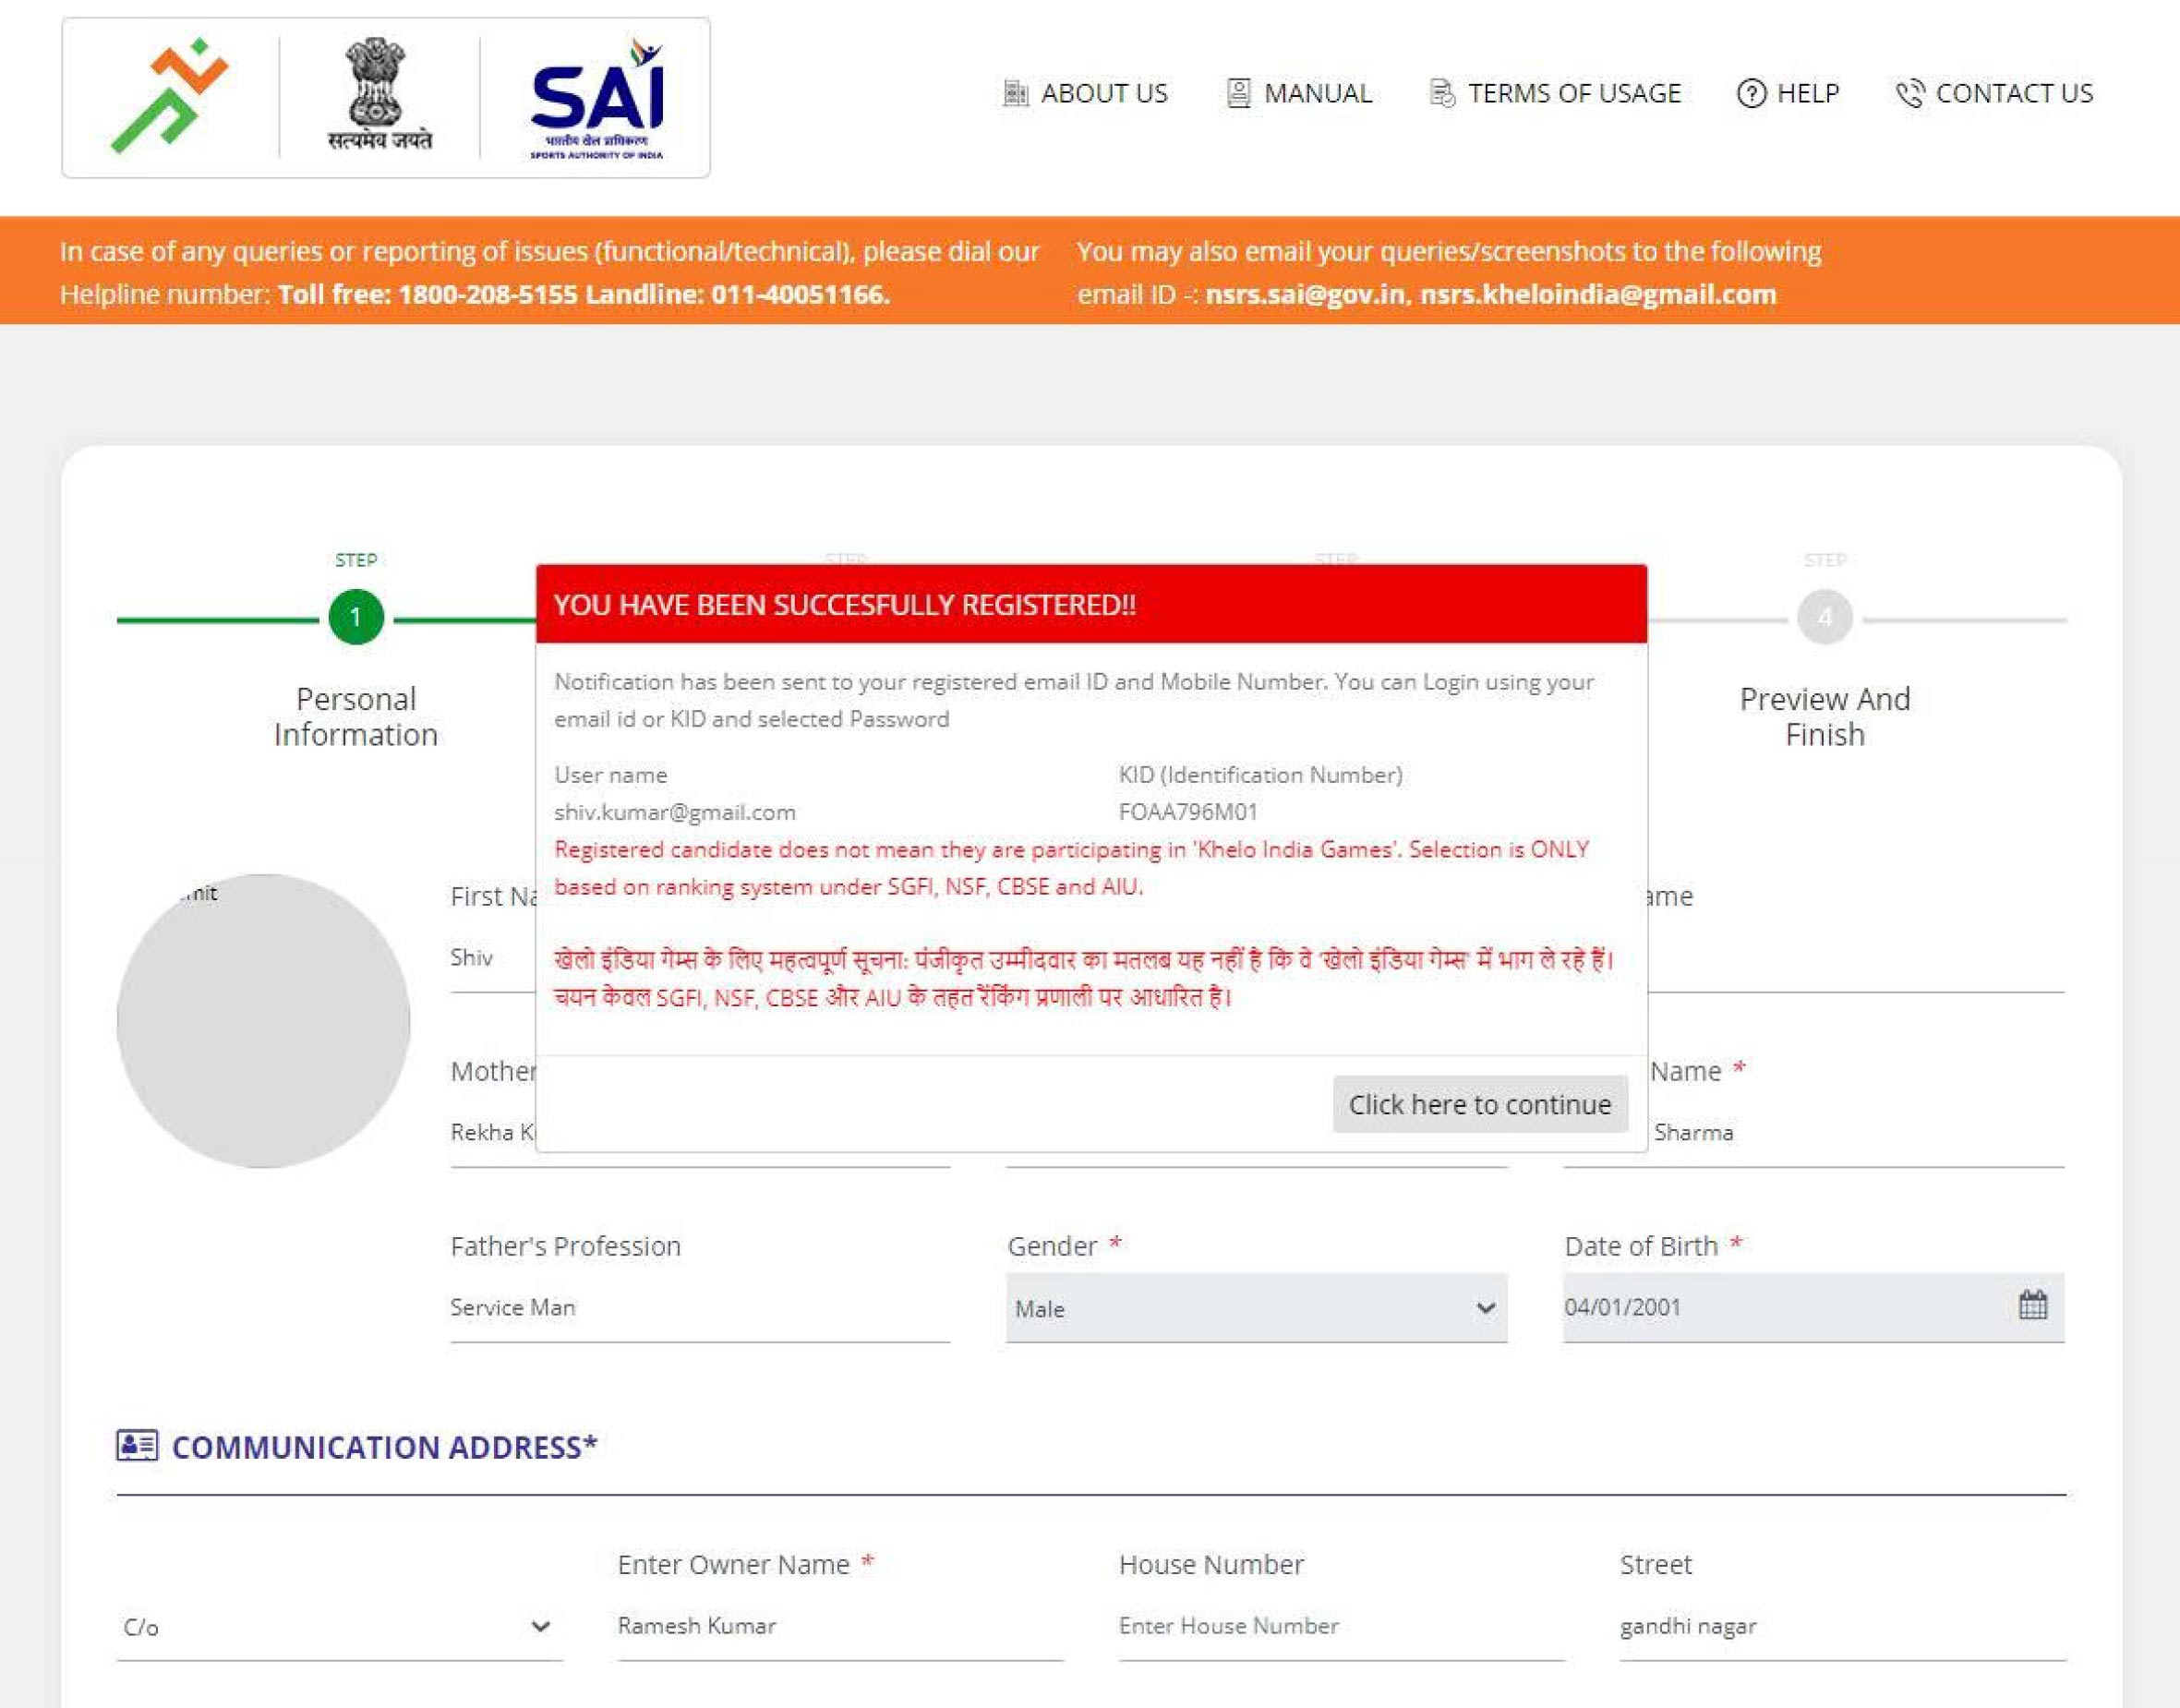
Step 5: If the details entered by the user is in correct format and the form is complete, the details will be saved and submitted and a pop-up with the unique KID no. and email id will appear. The pop-up will also have a message to complete the registration process.
The user will also receive a notifications on the mobile number and email id entered in the form stating that registration is successfully completed along with unique KID no.
Step 5: Post clicking on complete profile the system will direct the user to a new screen, where he/she need to enter following details:
Education:
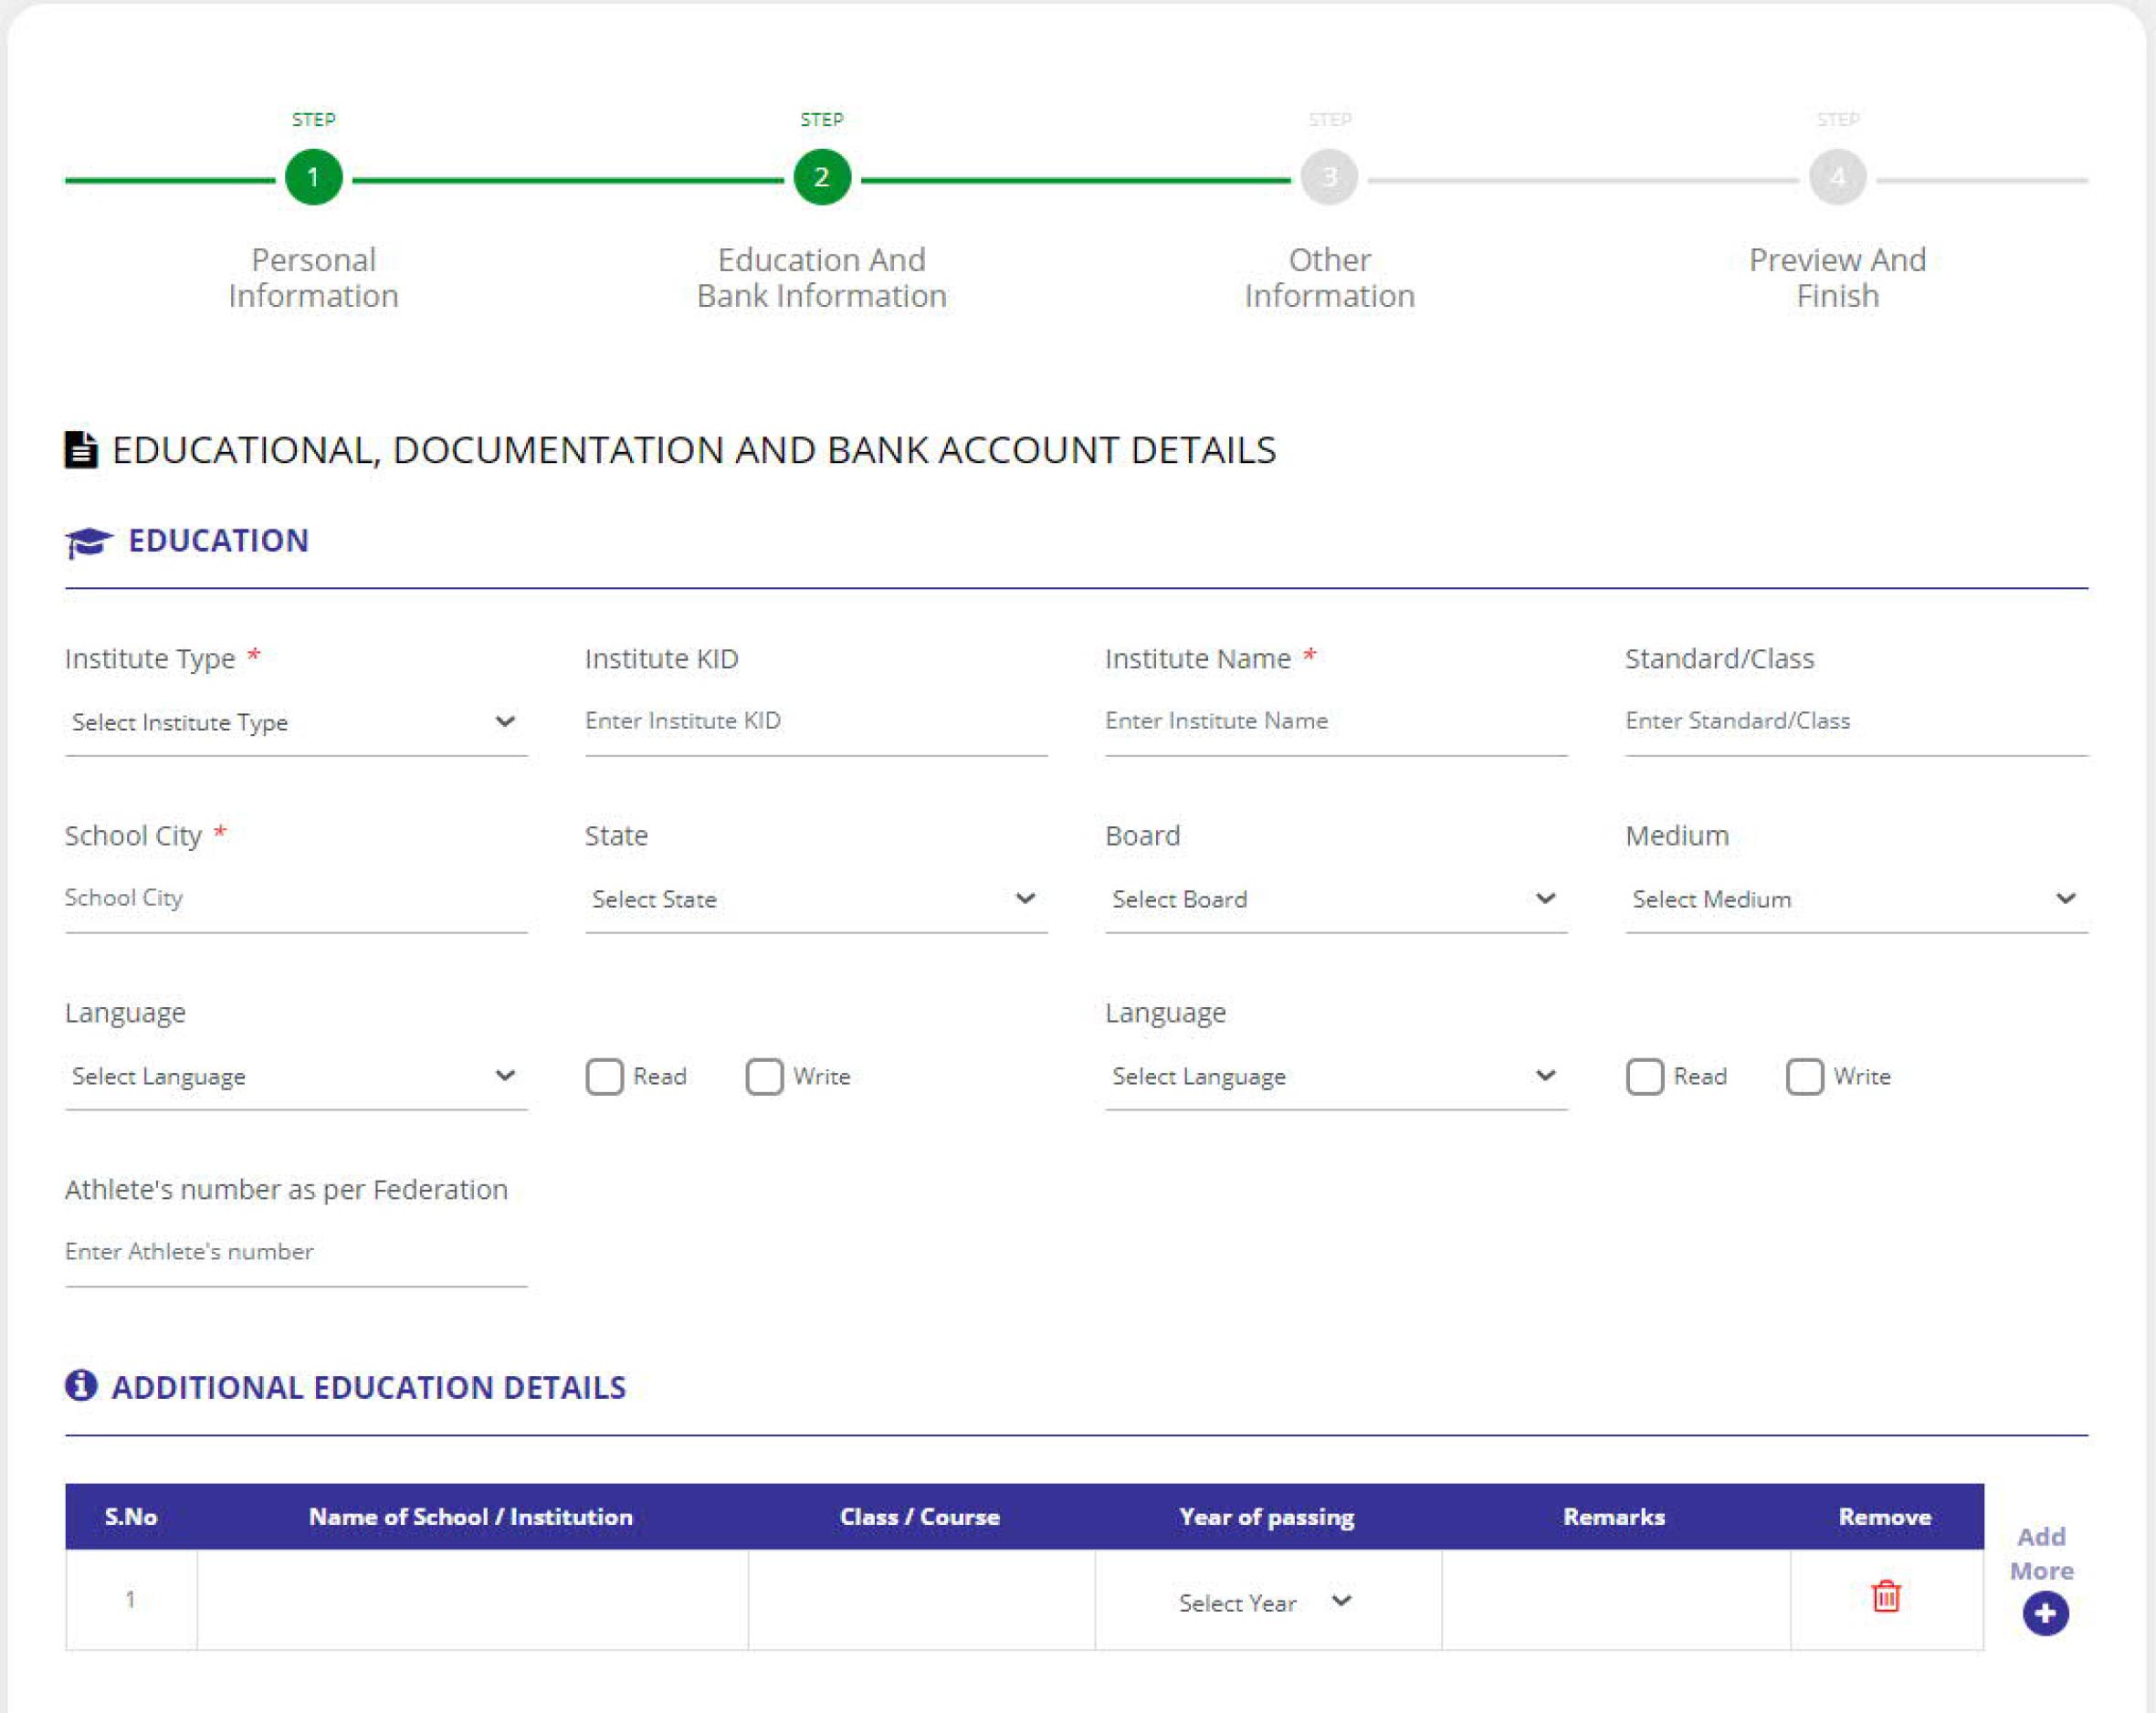
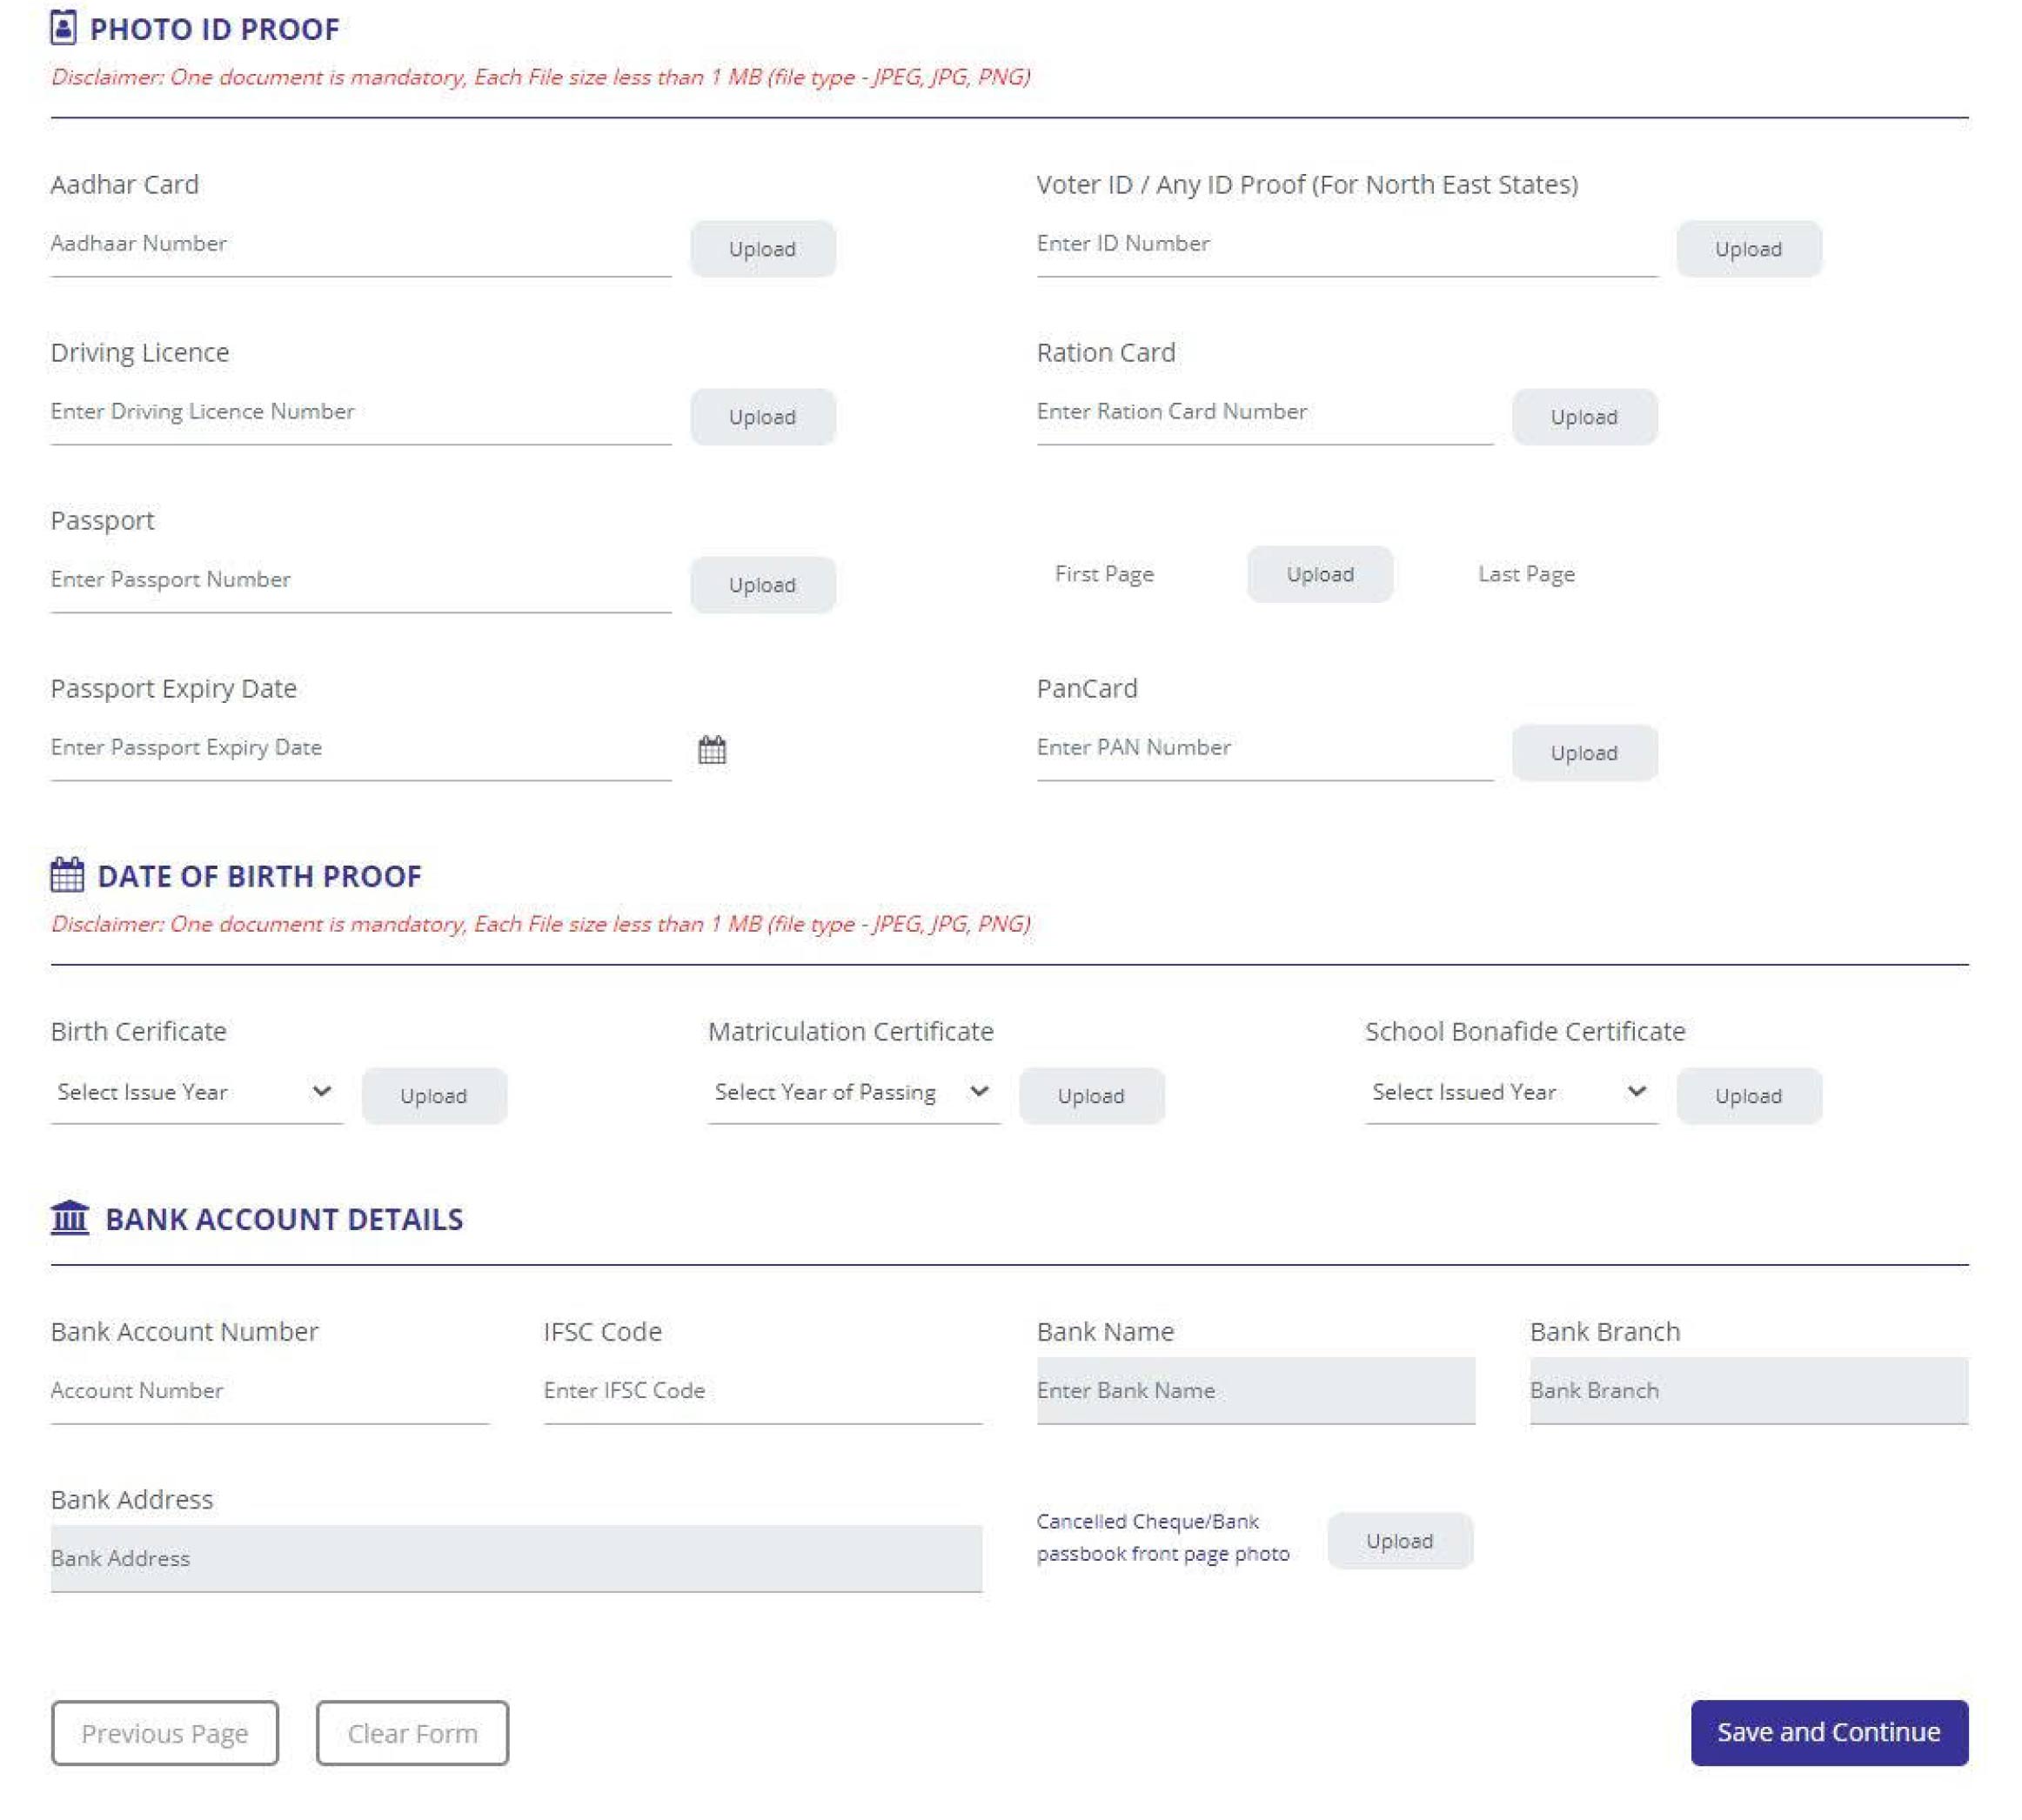
Photo Id Proof:
Date of Birth Proof:
Bank Account details:
Step 6: The user will get following options:
Post user click on save and continue; the system will direct him/her to a new page
Step 7: The user needs to enter the following details:
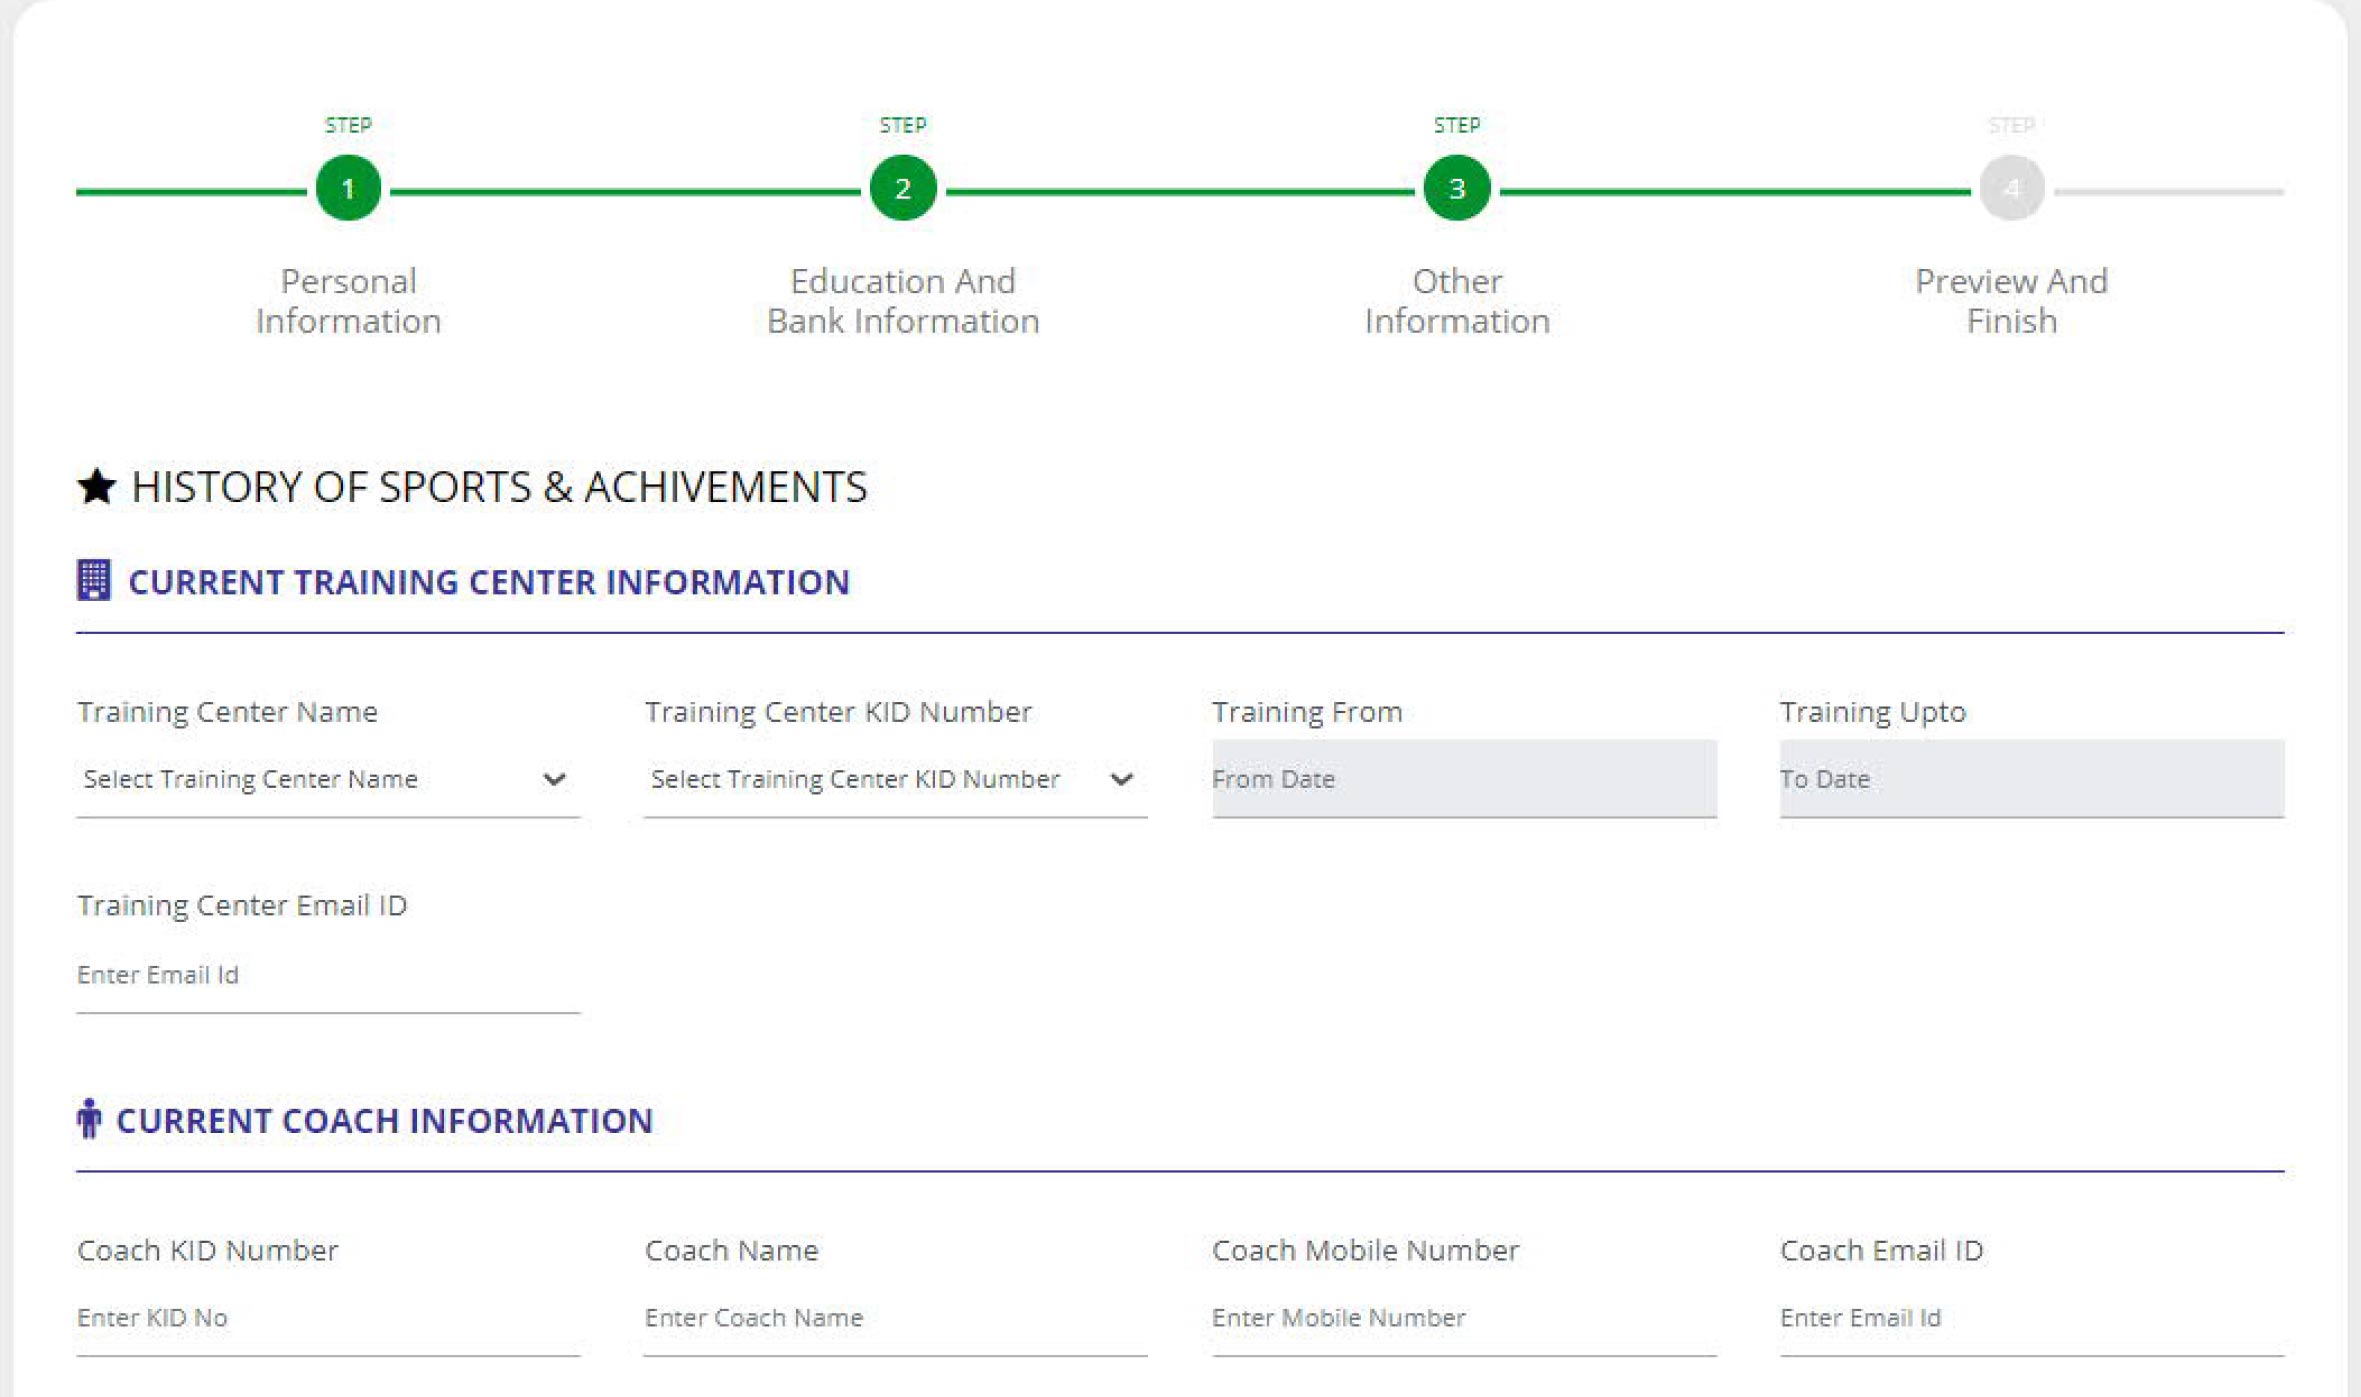
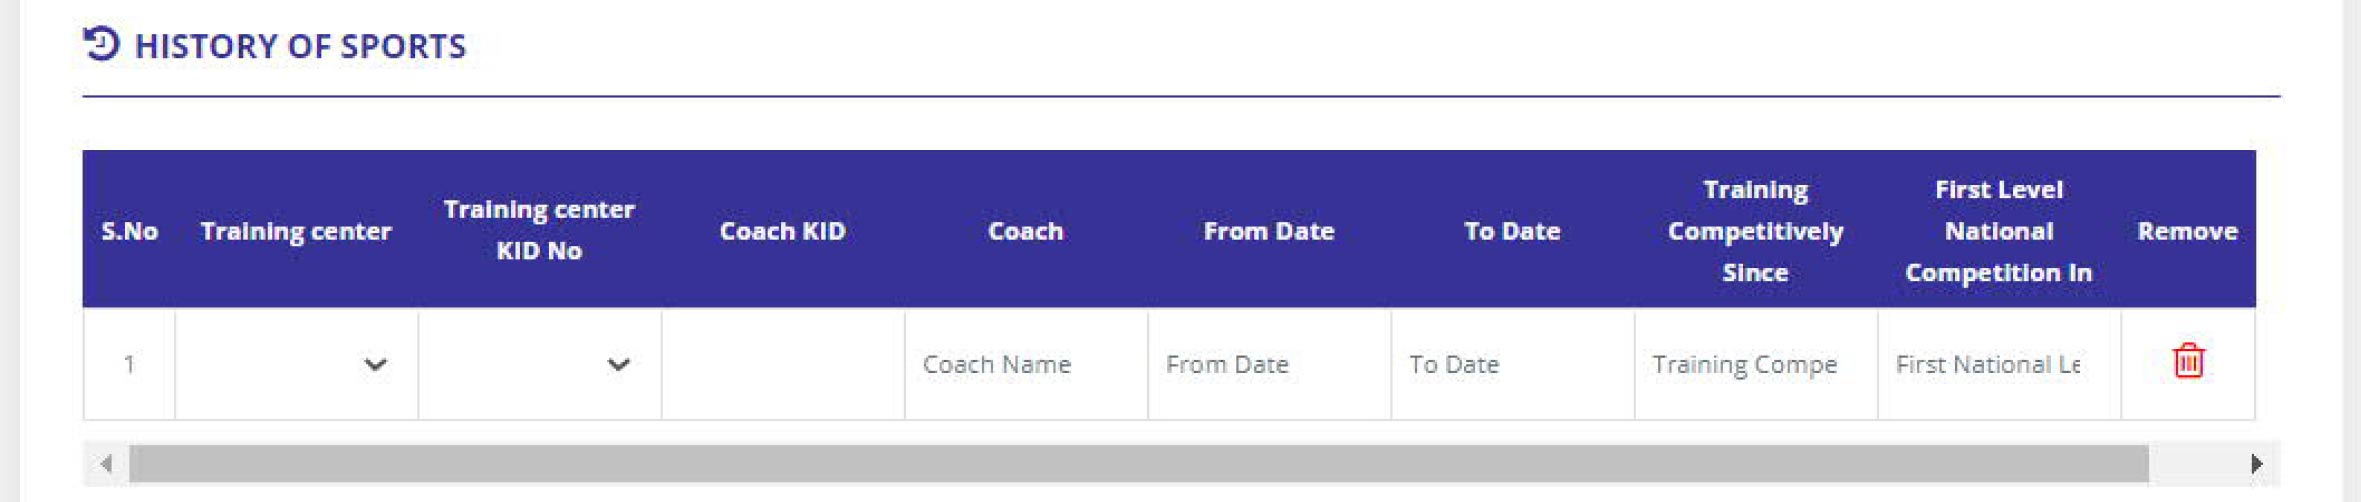
History of Sports:
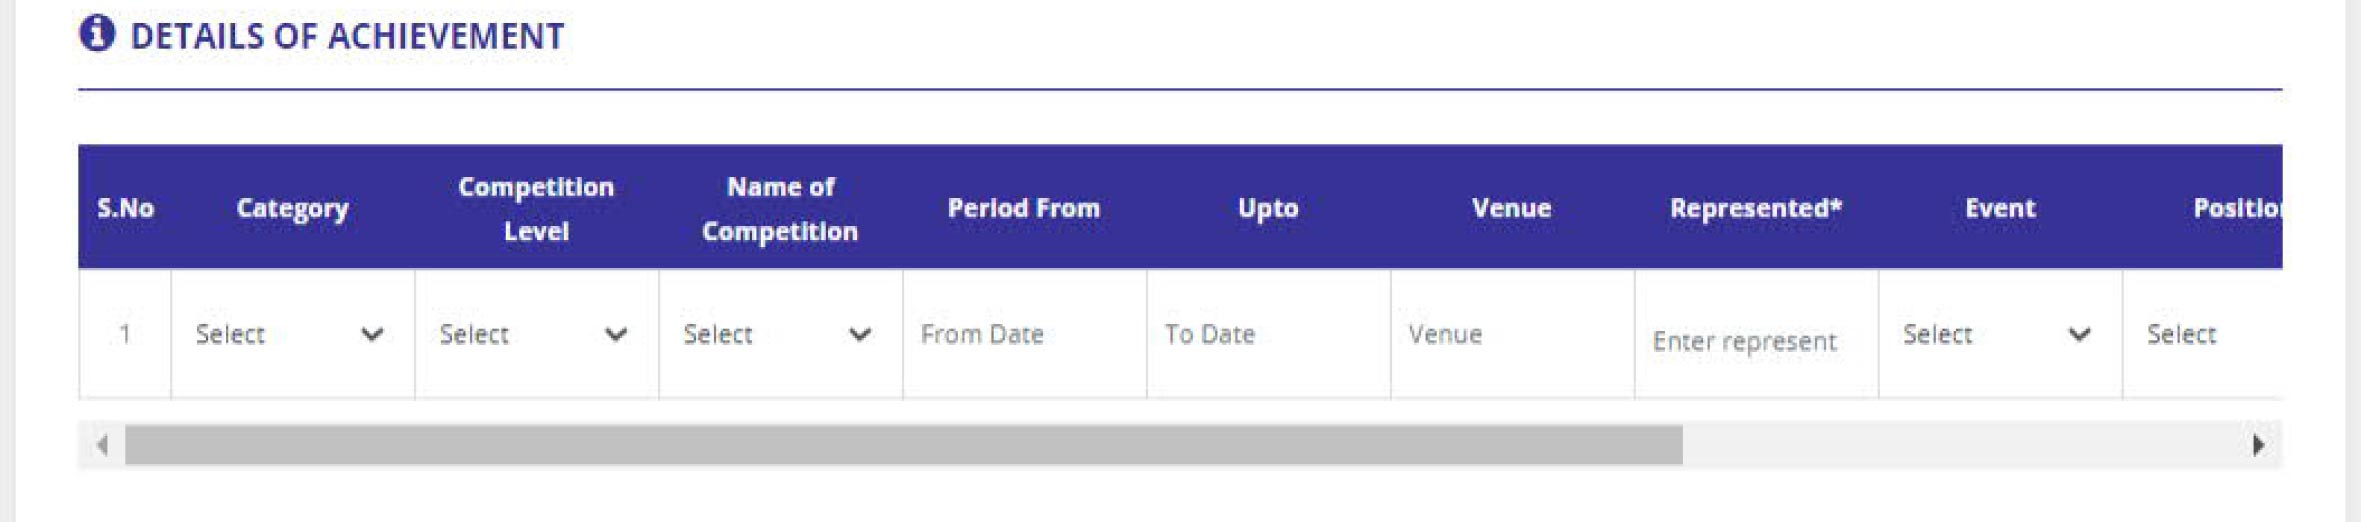
Details of achievement:
Athlete Ranking

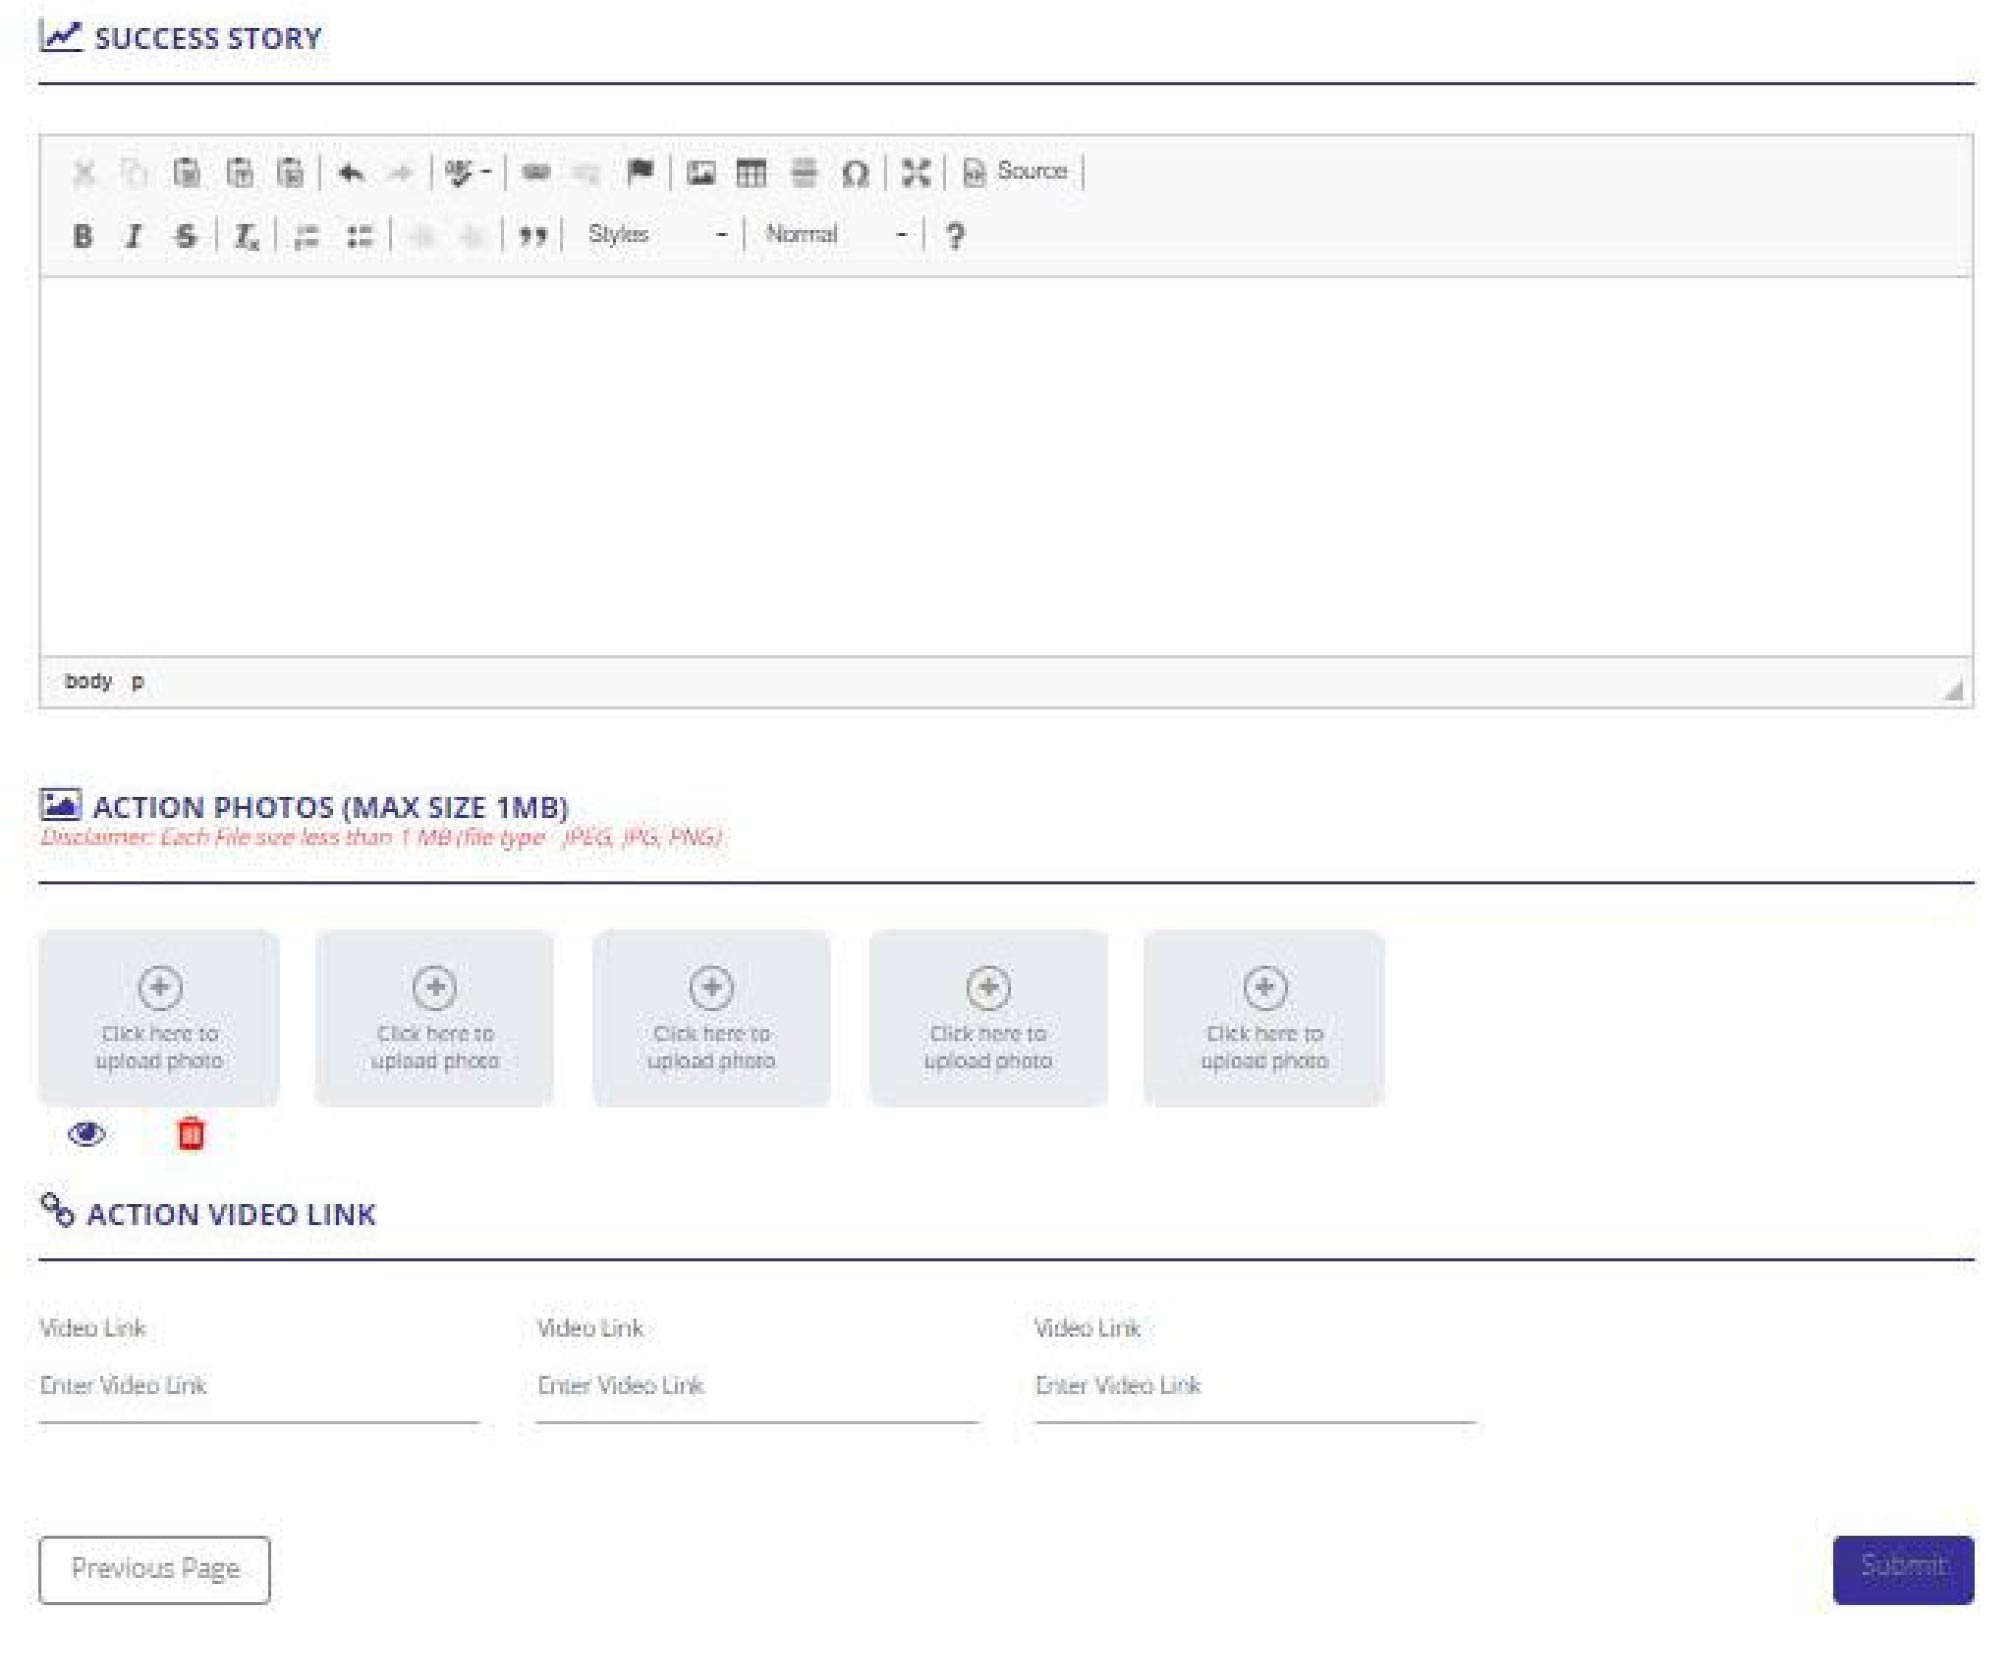
Success story
The user needs to write the success story, if any
Upload action photos
Embed Action Video Link
Step 8:
Step 9:Post clicking on submit, page is directed to final page i.e. Preview and Finish


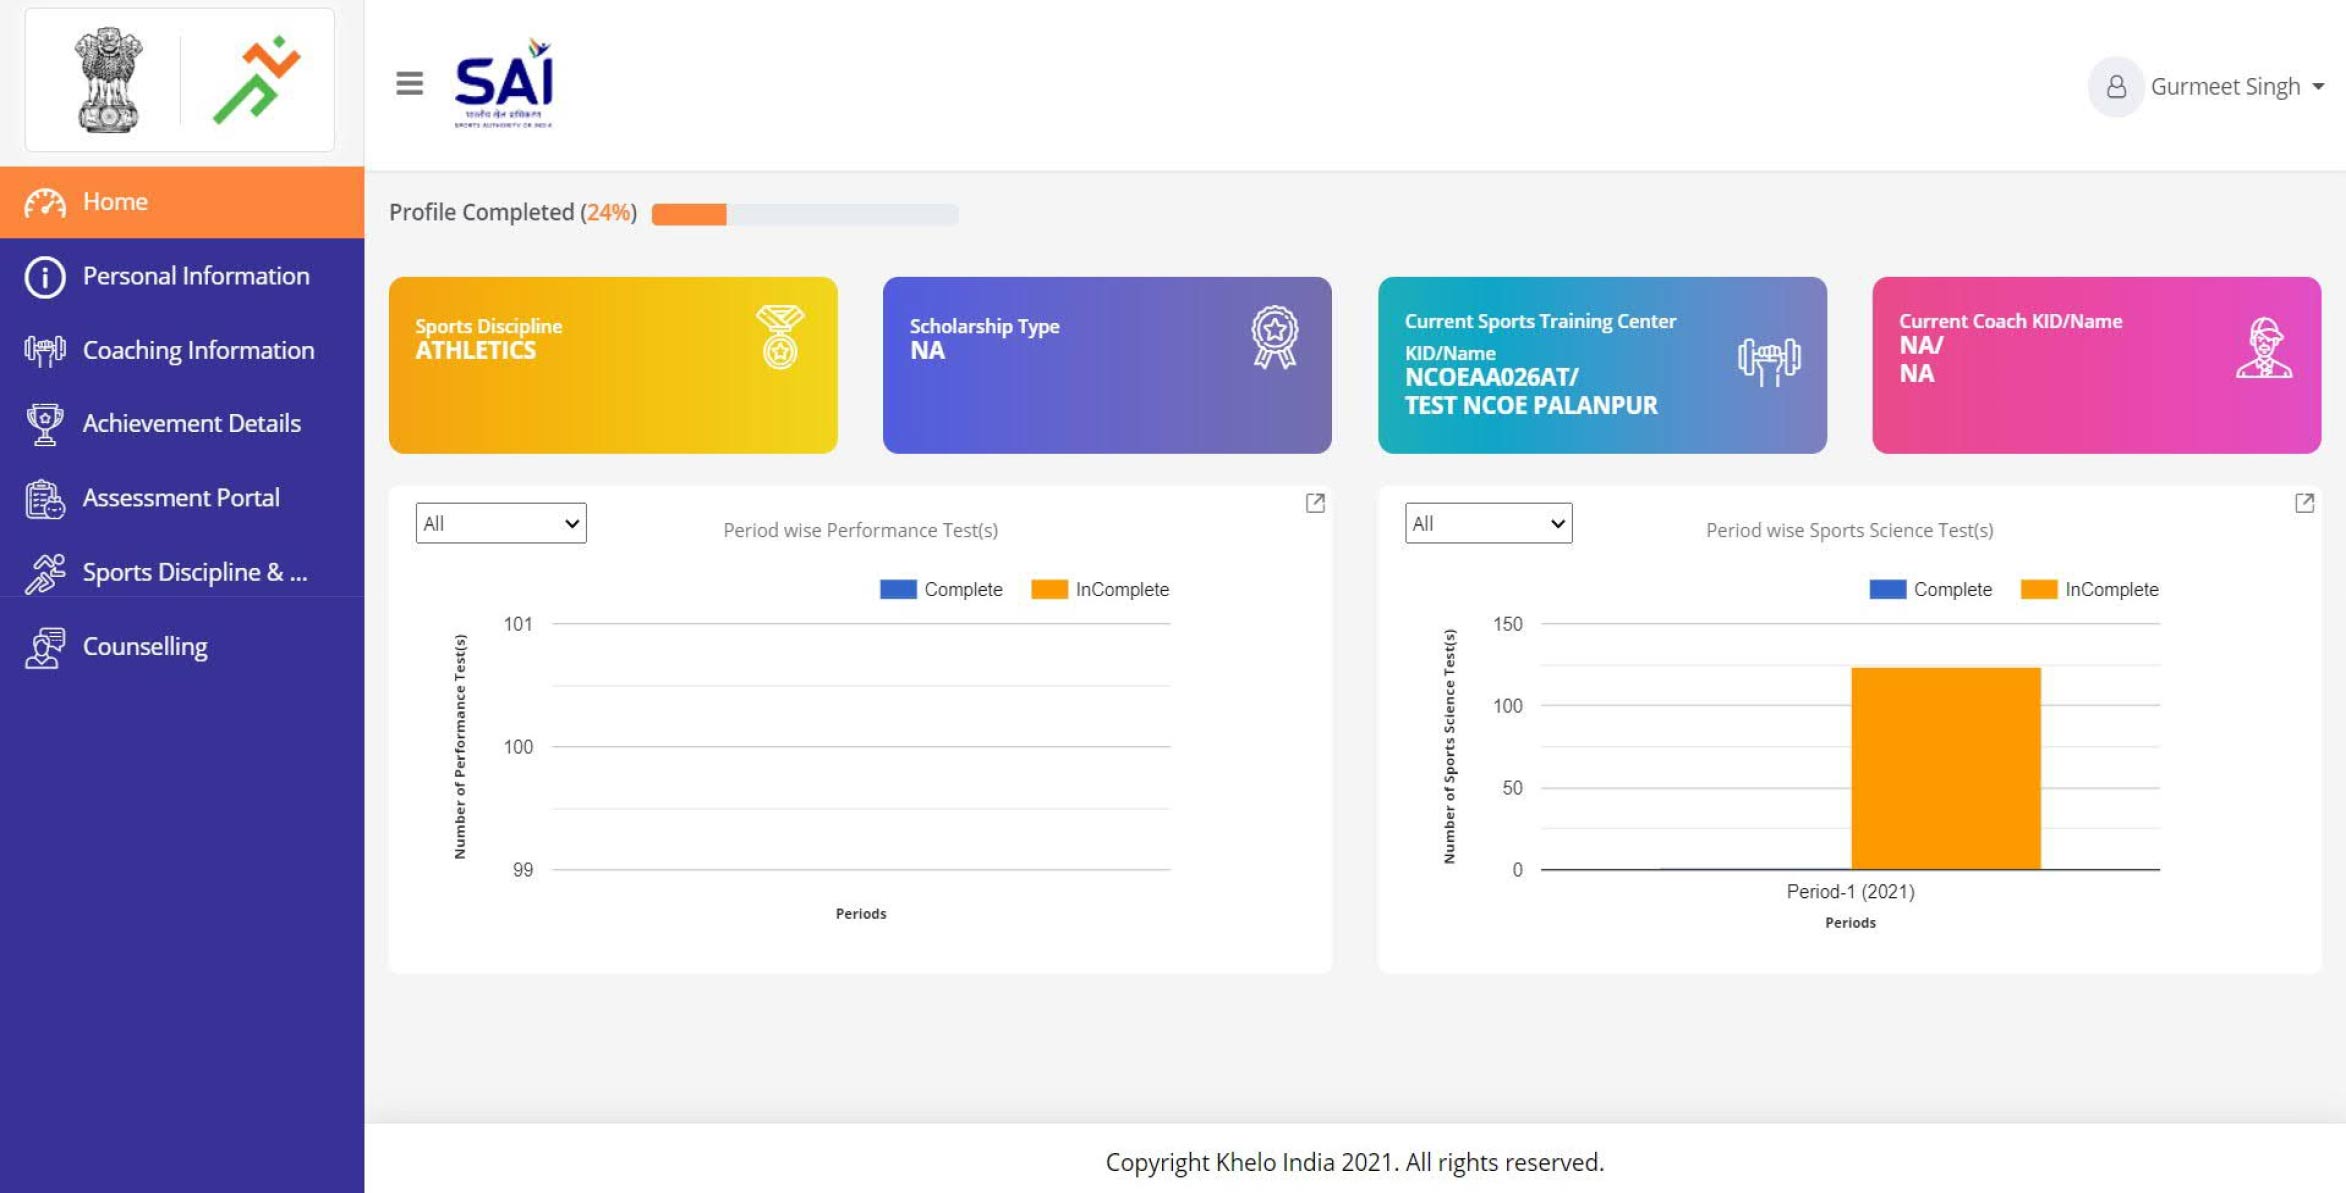
Step 10:Post clicking on submit, the system will direct the user to the Login page, where user will fill its KID as User ID and Password to login and redirected to Athlete Dashboard.
Forgot User ID/KID:
1. For retrieving User ID/KID, needs to click on tab “Forgot User ID” below the tab Login.
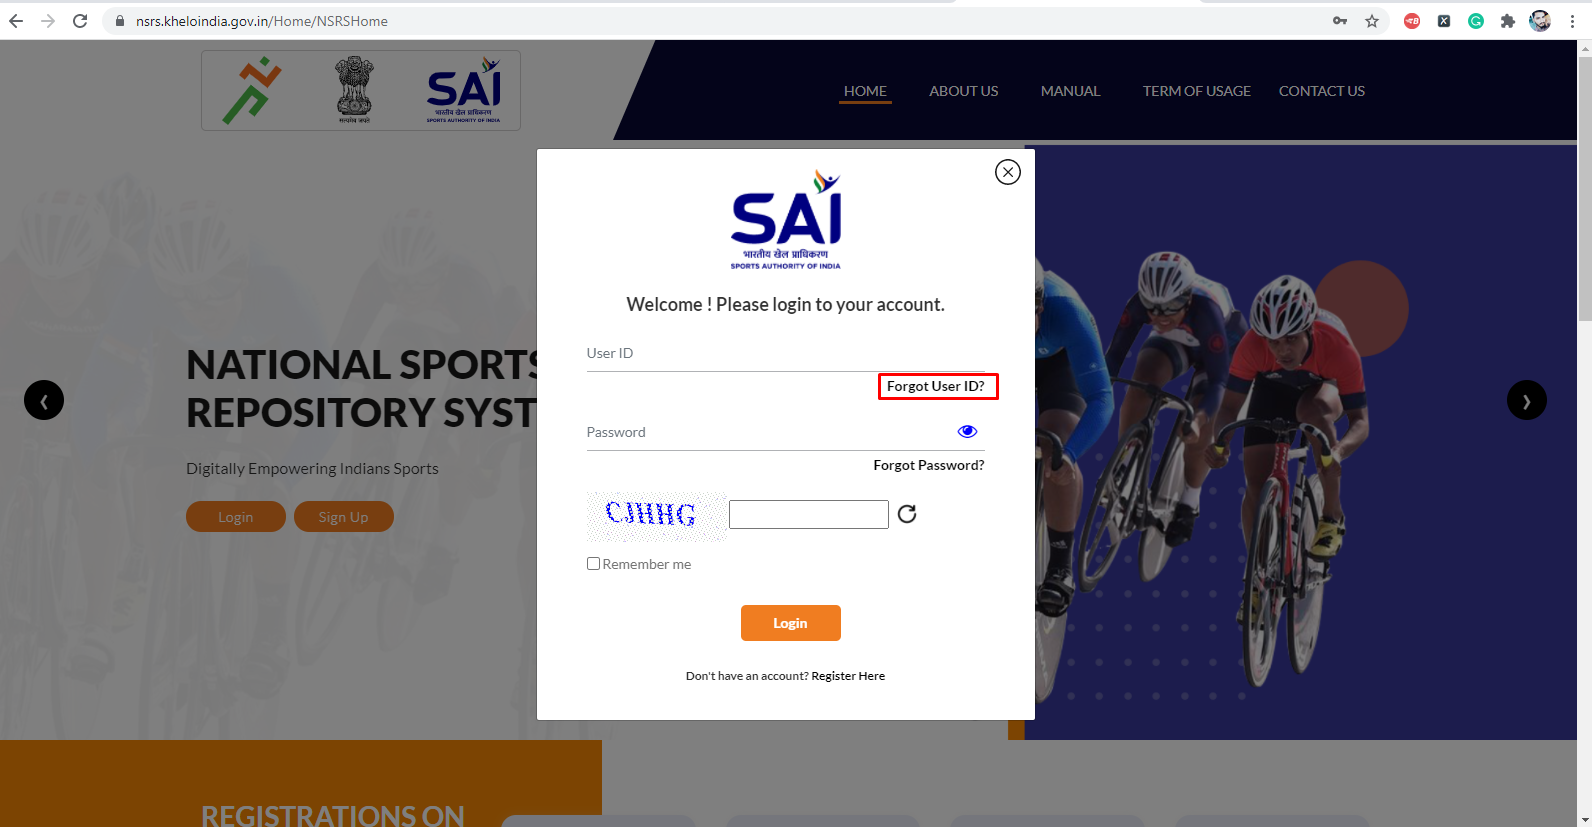
2. The system will direct the user to a new page to enter the Registered Mobile No

3. After entering the registered Mobile No., click on “Click to Generate OTP”.
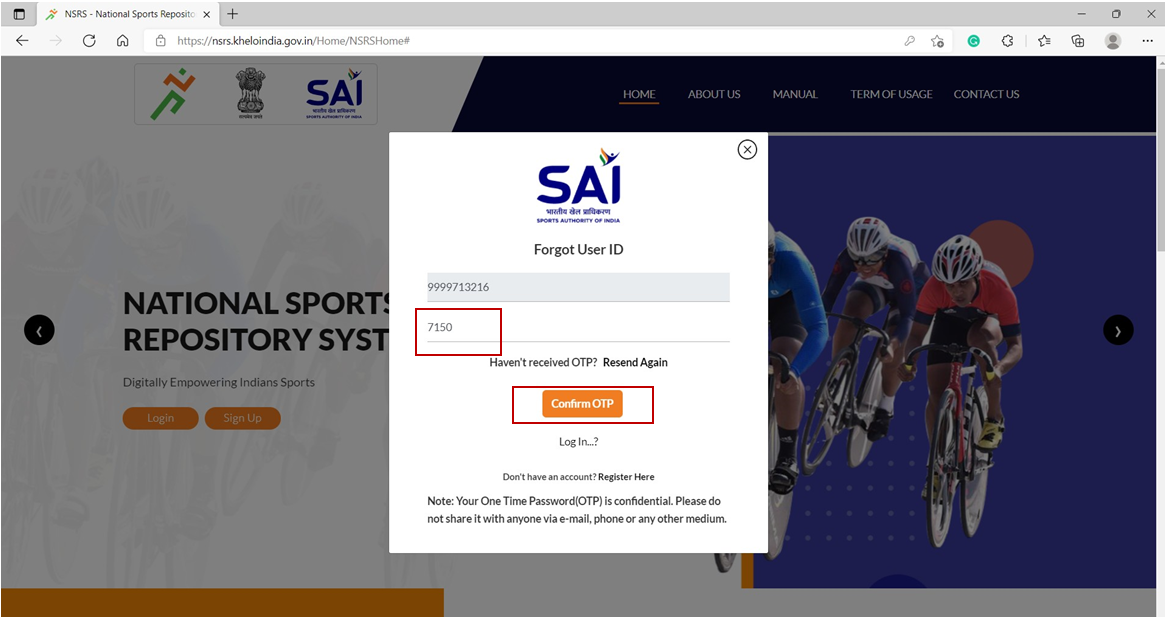
4. After filling the OTP, click ““Confirm OTP”. Further, if the user didn’t received the OTP, User can Resend the OTP again by clicking “Resend Again” option.
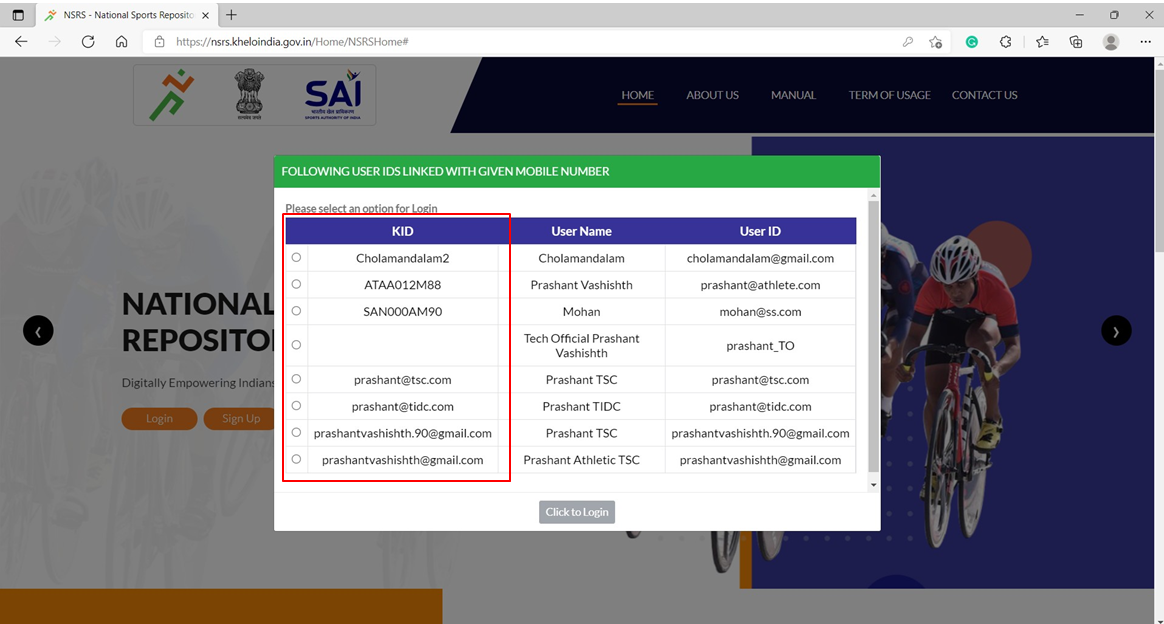
5. After successful OTP verification, all the KIDs associated to the linked mobile no. will be tabulated and the user may note down the various User IDs associated with the mobile number choose “Click to Login”.
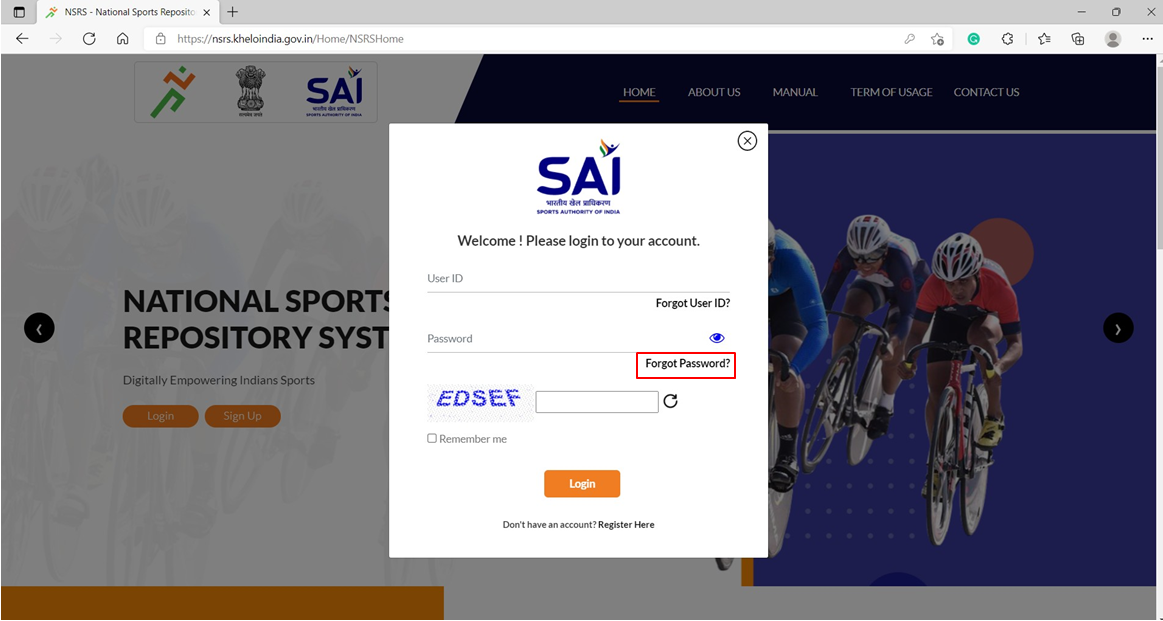
Forgot Password:
1. If any user knew KID and Forgets password for login, needs to click on “Forgot Password” option.
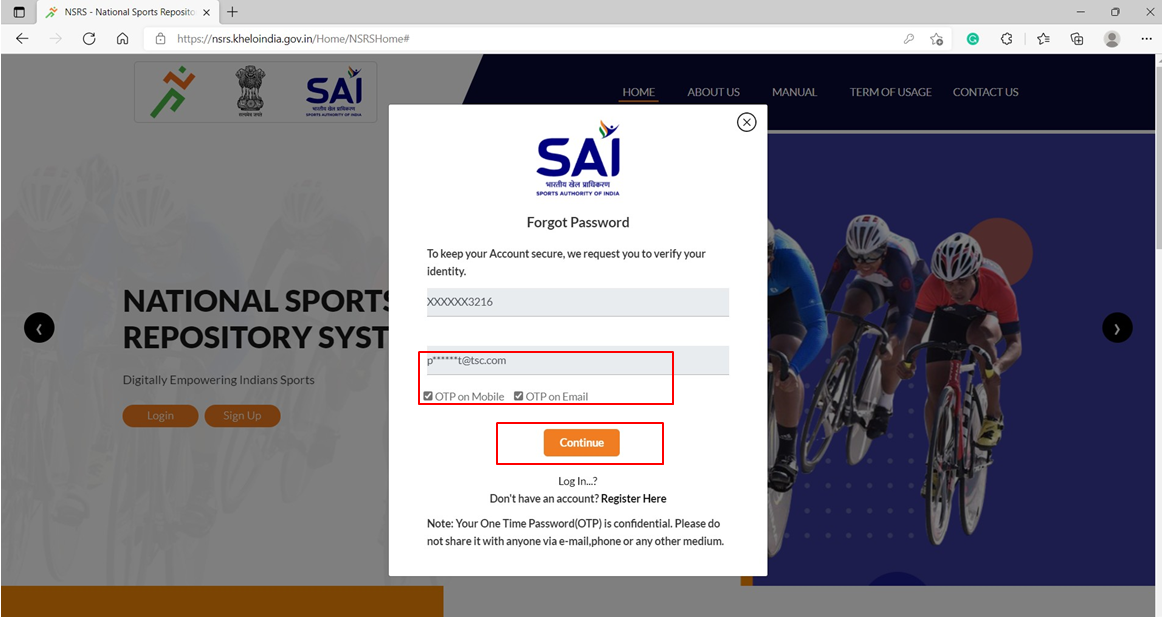
2. The system will direct the user to a new page to enter the Registered Mobile No./Email Address/KID.

3. After entering the registered Mobile No./Email Address/KID, click on “Submit”. Further, it is to inform that if any user has registered single mobile no. to more than one account on NSRS, the mobile no. won’t work for resetting the password. Accordingly, the user is required to enter KID or email Address as KID and email address are unique entity used for resetting the password.
4. After submitting, portal will ask the user to recover password using Mobile No. or Email Address by providing check box facility to choose the option or user may chose both the option i.e. “OTP on Mobile” and “OTP on Email”. Click on “Continue” option to enter OTP received and Submit.
5. After submitting, the user can create new password by entering password and click on “Submit”.
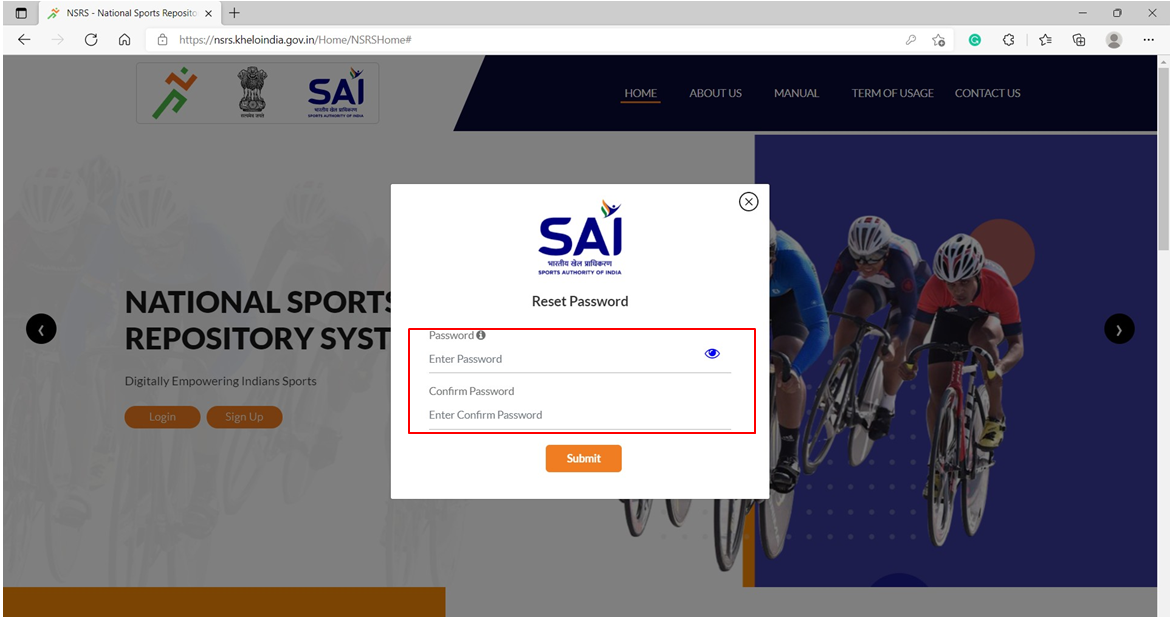
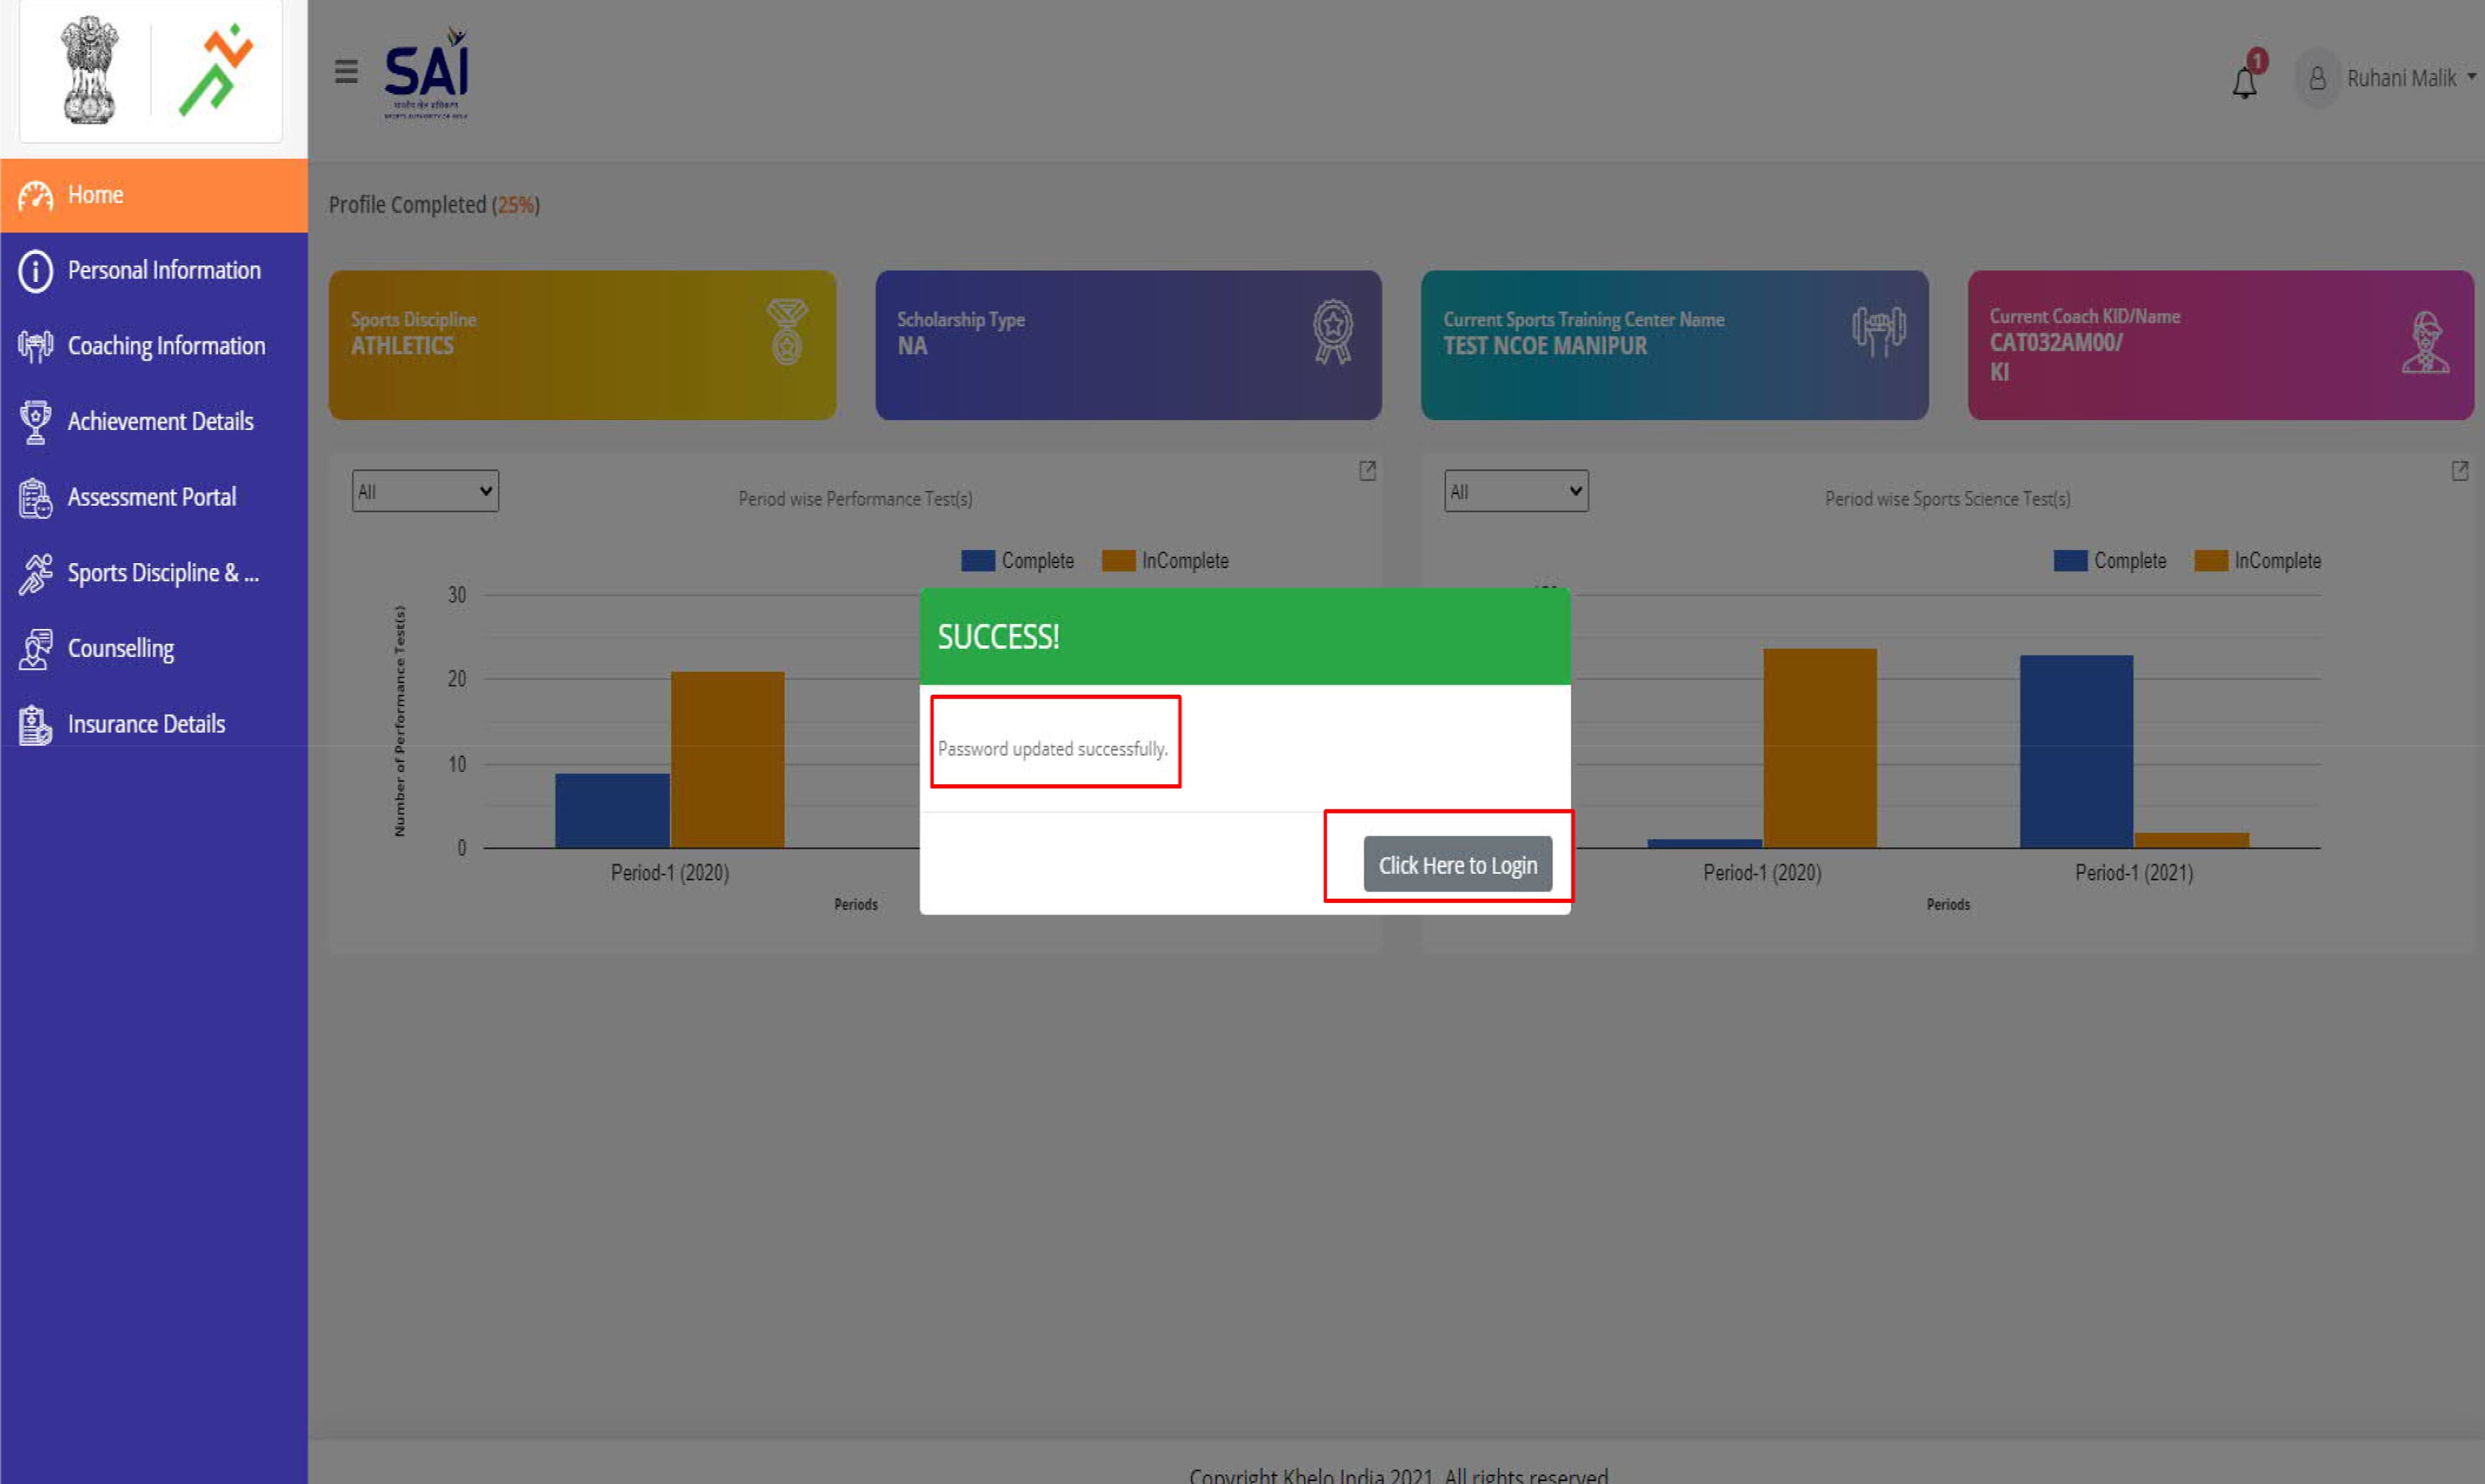
6. After clicking on Submit, a dialogue box will appear namely “ Password updated successfully ”. Now choose “Click to Login” option, it will redirect user to Login page to login the account using new password and User ID.

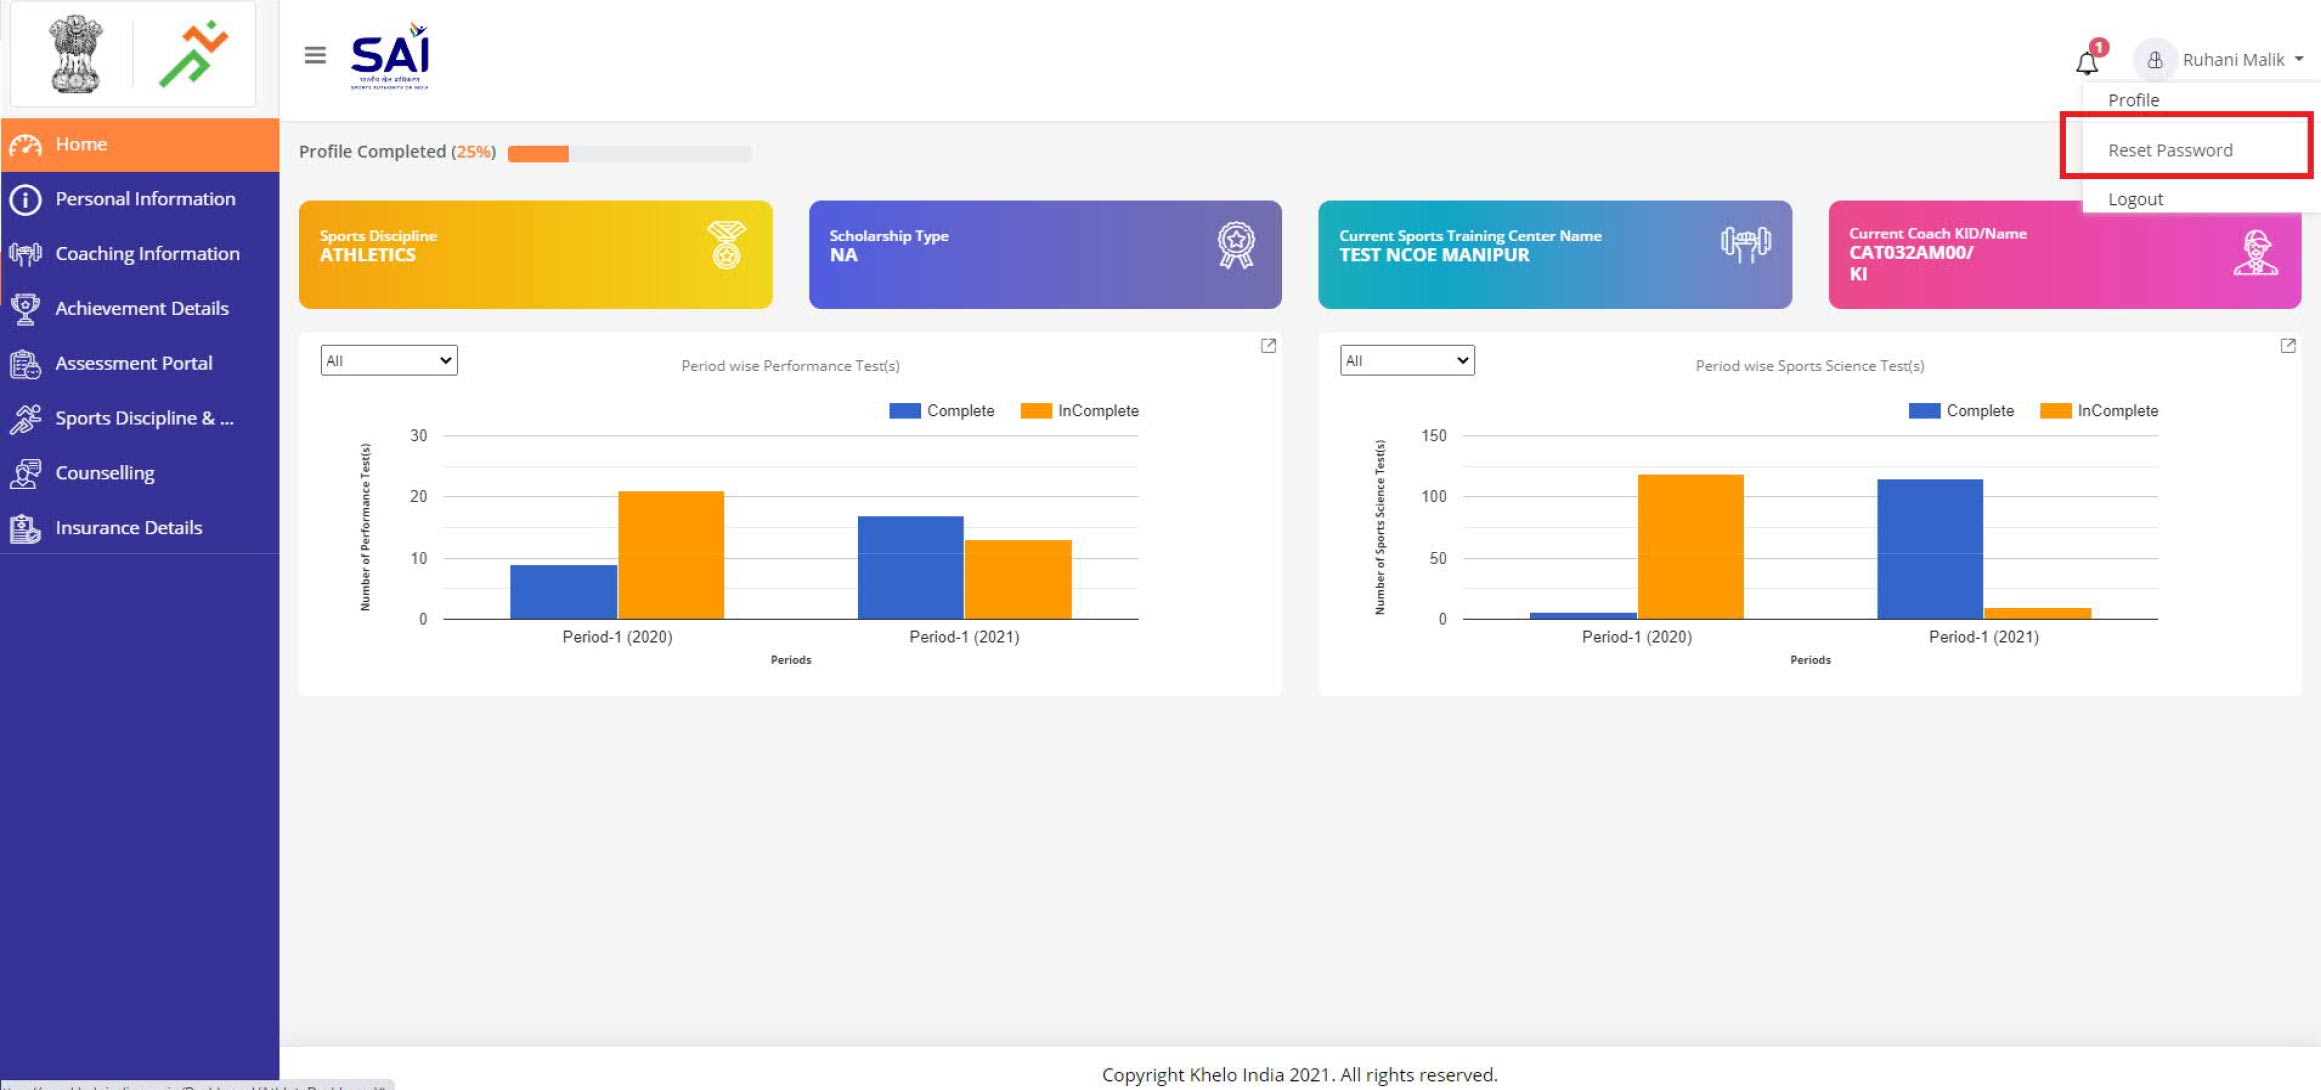
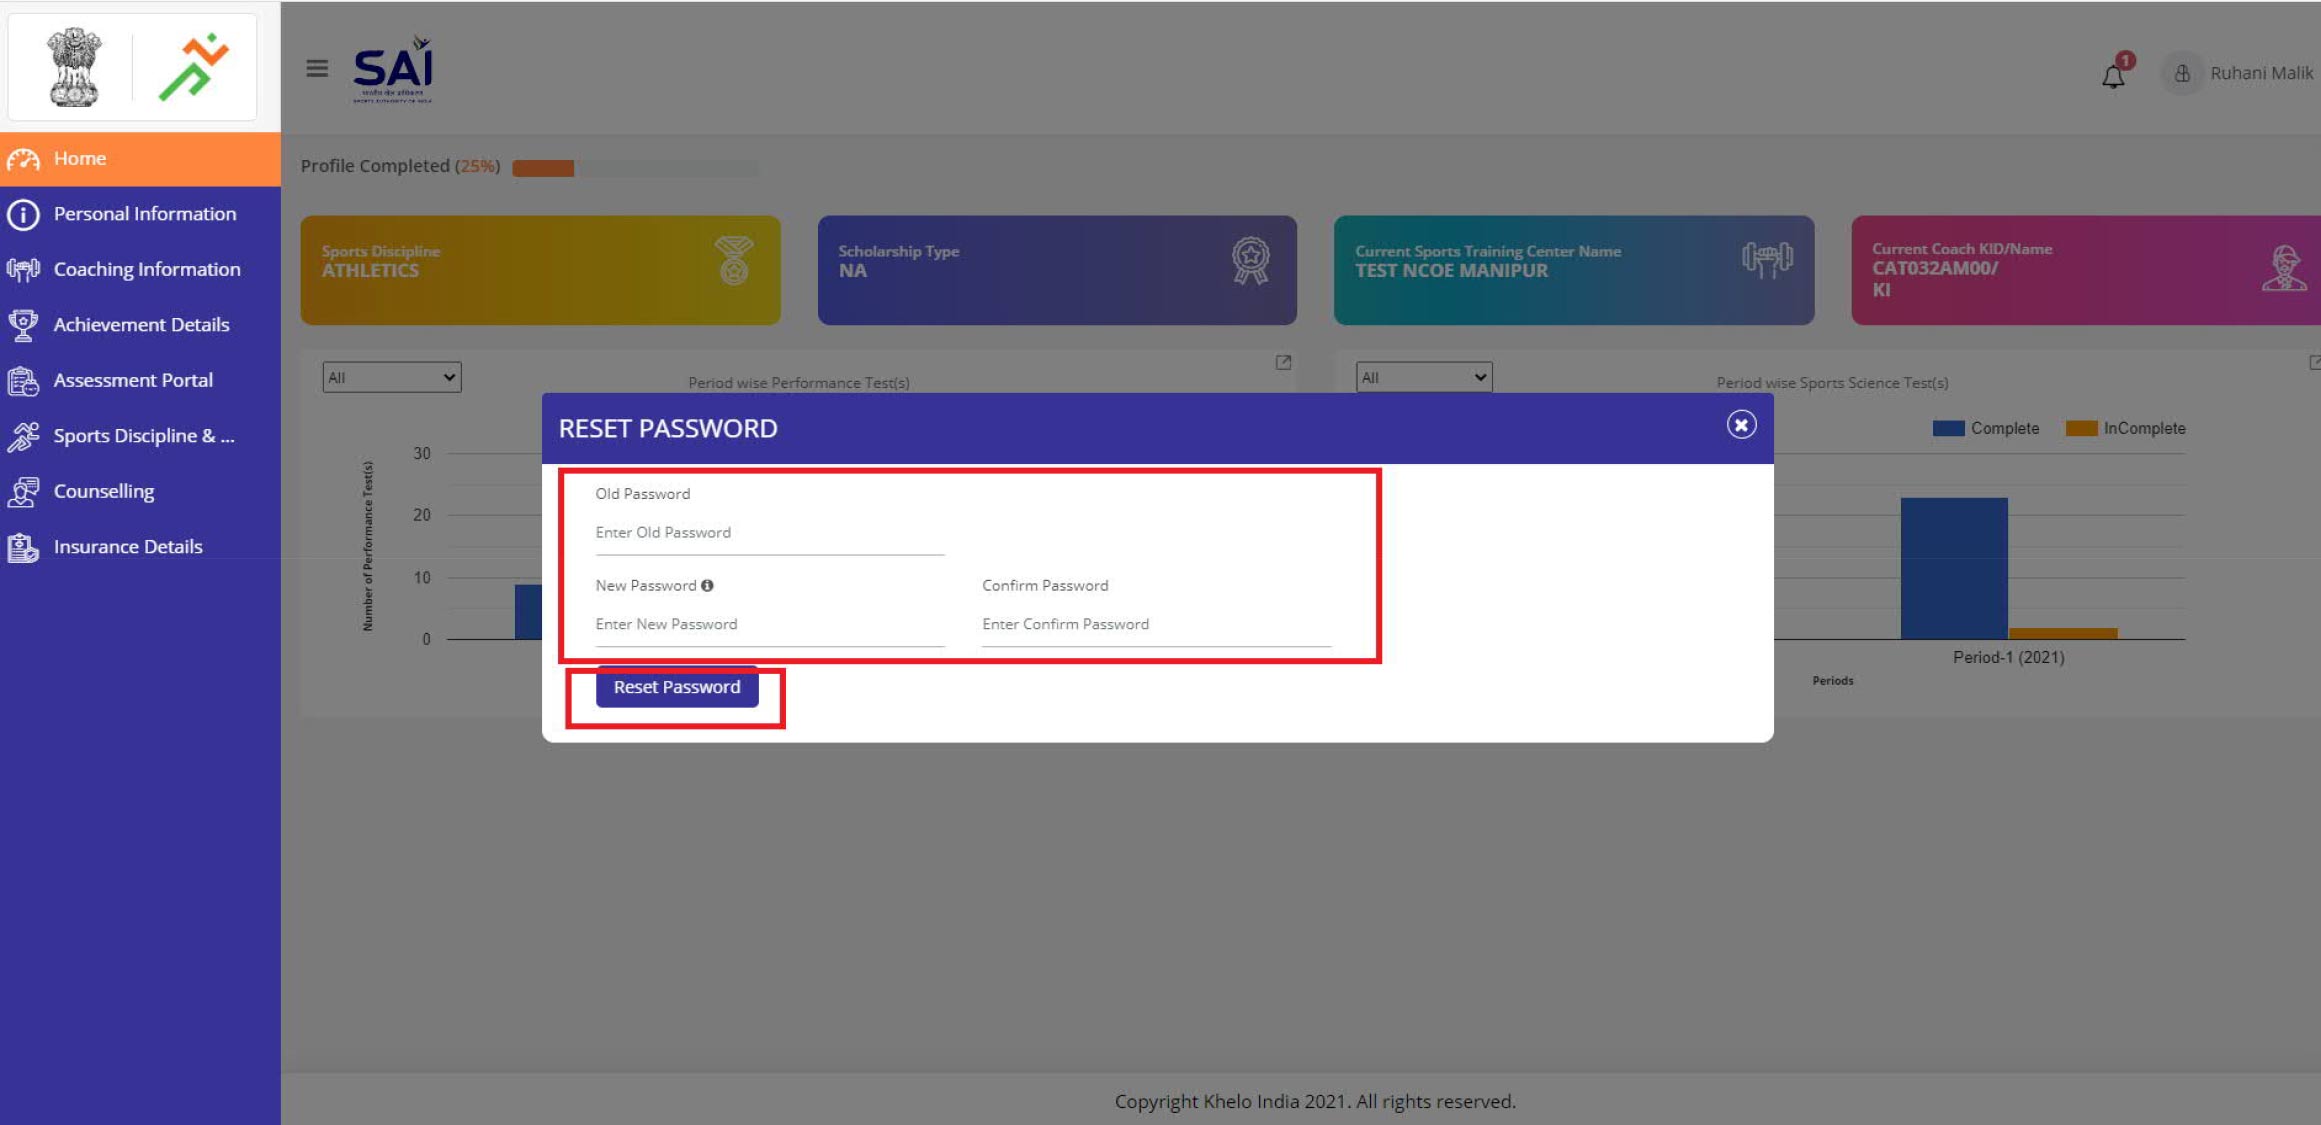
Reset Password:
1. If the user is logged into the NSRS account, and the user wants to reset the password, click on the Name of the User mentioned at the top right corner of the Screen and choose “Reset Password” option
2. A dialogue box will appear, where the user is required to enter Old Password along with the New Password. After entering both the passwords, click on “ Reset Password ”.
3. A new dialogue box will appear namely “ Password updated successfully ”. Choose “ Click here to Login ” option, it will redirect the user to Login page of NSRS portal and user can login with the new password generated.